How to Rig a Character in Blender (2026): Rigify, Manual Armatures, and the One-Click Route
Last updated: September 2026.
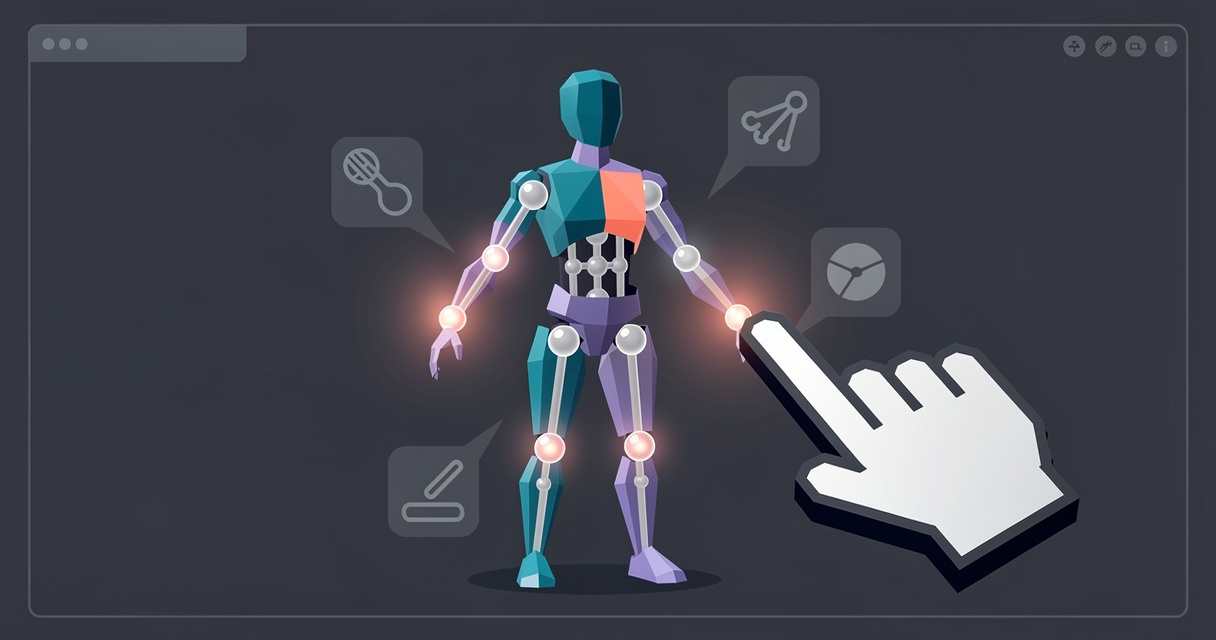
To rig a character in Blender you fit a skeleton (an armature) inside the mesh, bind the mesh to it, and check that elbows, knees, hips and wrists bend without tearing. For most humanoids the fastest free route is Rigify: add the Human metarig from Add > Armature, move its bones onto your character, press Generate Rig, then parent the mesh with Ctrl-P > With Automatic Weights. If you'd rather not place bones at all, an auto rigger inside Blender does the whole job in one click, and a hand-built armature with IK constraints is the route when you want a small custom skeleton with exactly the bones your game needs.
Quick picks
- Most people, free: Rigify, bundled with Blender. Fit the metarig, Generate Rig, automatic weights. Budget an evening the first time.
- Smallest game skeleton or a non-human shape: a manual armature with IK. Around 17 bones for a biped, an hour or three, and you name every bone yourself.
- Fastest: the Cinevva Rig add-on. Select the mesh, press Rig, get a skinned Mixamo-named armature in about fifteen seconds. Runs on your own machine, offline, for one $29 purchase (launch price), Blender 4.2 and newer on Windows, macOS and Linux.
- The established paid option: Auto-Rig Pro, $50 for the Full edition or $25 for Lite on Superhive, with Smart bone placement for humanoids and its own FBX and glTF export module.
- Nothing to install: upload a GLB, FBX or OBJ to the web Auto Rigger. Your first rigged character is free.
- Before any of them: one mesh, A-pose or T-pose, origin at the feet,
Ctrl-A > All Transforms. Skipping this step causes most rigging failures.
Quick reference
| Route | Time for a first rig | What you place by hand | Cost | What you end up with |
|---|---|---|---|---|
| Rigify | An evening, under an hour once practised | Every metarig bone, then weight fixes | Free, bundled with Blender | Full control rig with IK/FK switching, DEF- bones for export |
| Manual armature + IK | One to three hours | Every bone, every constraint | Free | Exactly the bones you chose, named your way |
| Cinevva Rig add-on | About fifteen seconds after a one-time 2.4 GB engine download | Nothing, you pick the front view and body plan | $29 once, no subscription | Skinned Mixamo-named armature, 260 CC0 clips, export presets |
| Auto-Rig Pro | Minutes for a humanoid with Smart | Markers to confirm, or reference bones without Smart | $50 Full, $25 Lite | Control rig plus FBX/glTF export for Unity and Unreal |
| Web Auto Rigger | Under a minute | Nothing | First character free | Rigged GLB with clips baked in |
Prepare the mesh first
Every route below wants the same input, and the ten minutes you spend here save an hour of weight painting later. Our automatic rigging explainer goes deeper on why.
- Join into one shell. Select all the body parts and press
Ctrl-J. Separate shells for shirt, trousers and skin can stay as one object. What hurts is a floating hat, sword or backpack: parent those to a bone afterwards instead of skinning them. - Delete any existing armature and remove the old Armature modifier and vertex groups from the mesh (Object Data Properties, Vertex Groups, the small down-arrow menu, Delete All Groups). Old groups with bone names will otherwise be overwritten or, worse, half-kept.
- Pose the arms out. A-pose (arms 30 to 45 degrees down from horizontal) or T-pose. Arms hanging at the sides put the hands next to the thighs, and every weighting method will bleed leg weights into the fingers.
- Set the scale. Rigify's own documentation says it "assumes that 1 unit corresponds to 1 meter. So a human is about 2 units tall". Check Dimensions in the N panel. A character that reads 180 metres came in from FBX at centimetre scale, so scale it down in Object Mode.
- Put the origin at the feet and the feet on the floor at the world origin:
Object > Set Origin > Origin to 3D Cursorwith the cursor at world zero, then move the mesh up until the soles sit on Z=0. - Face the character toward -Y. Blender's front view (
Numpad 1) looks along +Y, so a correctly oriented character looks at you in front view. - Apply transforms:
Ctrl-A > All Transforms. The Apply page of the manual says it plainly: "It is recommended to apply transforms before rigging and animation." Unapplied scale and rotation are the reason rigs come out 100 times too big or lying on their back in a game engine.
Route A: Rigify
Rigify ships inside Blender. In Blender's own words it "helps automate the creation of character rigs" from "smaller rig parts (e.g. arms, legs, spines, fingers...)", and once generated "that rig should no longer need Rigify", so you can hand the file to anyone (Rigify introduction). One line from the same page sets expectations: "Rigify only automates the creation of the rig controls and bones. It does not attach the rig to a mesh, so you still have to do skinning etc. yourself."
Step 1: enable it
Edit > Preferences > Add-ons, search "Rigify", tick the checkbox. It ships inside Blender's core add-ons, so there's nothing to download.
Step 2: add a metarig
In Object Mode, Shift-A > Armature. With Rigify enabled the menu grows to include the metarigs the Basics page lists: "Basic Human (doesn't include face and fingers), Basic Quadruped, Human, Cat, Wolf, Horse, Shark". For a game character pick Basic Human unless you need finger bones, in which case pick Human and delete the face later. Rigify stores everything it needs to build the final rig inside this simpler armature, which is why the metarig is what you edit and keep.
Step 3: align the bones to the mesh
This is the step that takes the time, and the one that decides how the rig deforms. Before you start, select the metarig, go to Object Properties, Viewport Display, and set Display As to Wire with In Front ticked so bones stay visible inside the mesh. In the armature's Edit Mode, turn on X-Axis Mirror (the Options dropdown in the viewport header, also under the N panel's Tool tab) so moving a .L joint moves its .R twin.
Then work through the joints. The manual's Bone Positioning Guide and the alignment tips on the Basics page are the source for every hint here.
Hips and spine. The hips bone sits in the centre of the pelvis. Keep the spine "as centered as possible inside the mesh bounding volume, just apply a slight offset toward the back". Keep it "as straight as possible in the front view". The chain runs spine, chest, neck, head: the Basics page notes "the last bone of the spine is the head. By default the next two bones (top to bottom) are considered the neck bones".
Shoulders. The shoulder bones are "general deformers", so don't push them forward onto the collar bone, which "could cause undesired deformations".
Arms. First make "a straight line that goes from the shoulder to the hand in both front and top view", then add a slight bend at the elbow. The bend matters more than it looks: "Give the knee and the elbow a slight bend angle (Rigify needs to know where your knee/elbow is pointing)." Elbows point backward. Since Rigify 0.5 that bend also sets the bone roll for you, because "the generate function will take care of that for you by evaluating it from bend axis".
Legs. Same idea: a straight line from hips to ankle in front view, then a slight forward bend at the knee in side view. Place the foot and toe bones on the actual foot, and set the heel bone in front view so it fills "the foot size from side to side", then in side view "at the point where the heel just touches the ground floor". The leg rig type requires "a chain of four connected bones (thigh, shin, foot, toe) with one unconnected child of the foot to be used as the heel pivot" (Limbs rig types), so don't delete that odd little heel bone.
Fingers. Place knuckle by knuckle. The manual's trick: in the mesh's Edit Mode select the edge loop around a knuckle, Shift-S > Cursor to Selected, then in the armature's Edit Mode select the bone joint and Shift-S > Selection to Cursor. Once all fingers are placed, select every finger bone and run Armature > Bone Roll > Recalculate Roll > Global -Z Axis. The thumb "may require more tweaking", with Global +Y Axis as the suggested start. Keep the palm bones' heads "at a little distance between each other", because Rigify uses that gap to build the palm controls.
Face. Unless you're animating expressions with bones, delete it. Show only the Face bone collection, select all, delete in Edit Mode. Game characters use shape keys or a separate facial rig anyway, and the manual itself says face bones "are almost useless if you plan to make facial animation through shape keys".
Step 4: Generate Rig
Back in Object Mode, with the metarig selected, open the Armature tab in Properties, scroll to the bottom and click Generate Rig. The manual says generation takes "from few seconds to one minute". A new armature called rig appears with coloured control shapes. Don't delete the metarig. Rigify "is designed assuming a workflow where the meta-rig is kept available", so if a knee bends wrong you move the metarig bone and press Generate Rig again, and Rigify overwrites the existing rig "retaining all your modifiers and constraints". For that overwrite to work "you need to have both the rig and the meta-rig visible before generating again".
Step 5: bind the mesh
Select the mesh, then Shift-click the generated rig so the armature is active, then Ctrl-P > With Automatic Weights. Blender's Armature Deform Parent page describes what happens: it "calculates how much influence a particular bone would have on vertices based on the distance from those vertices to a particular bone ("bone heat" algorithm)". Only bones with Deform ticked get vertex groups, and on a Rigify rig those are the ones in the DEF bone collection.
Rigify's own verdict on this step is encouraging: "Usually armature deform with automatic weights does a really good job out of the box if you correctly place your bones (and there is enough topology to work with!)". The parenthesis is the catch. A knee with one edge loop can't crease no matter how good the weights are. Give joints three loops.
Step 6: understand what you got
Rigify generates three kinds of bones, named by prefix in its source: ORG- for original bones copied from the metarig, MCH- for mechanism bones, and DEF- for deformation bones. On top sit the control bones with no prefix: the gear-shaped limb masters, red IK and green FK controls, blue tweak spheres. Select any control and the Item tab of the N panel shows the Rig Main Properties panel with an IK-FK slider that blends "between full IK at 0 and full FK at 1", IK Stretch, a Toggle Pole switch and parent switching (Generated Rig Features).
A game engine wants none of that. It needs the DEF- bones and their weights, nothing else, because constraints and drivers don't survive export and the control bones would add hundreds of useless transforms. Blender's glTF exporter has a checkbox for exactly this under Data, Armature: "Export Deformation Bones only: Export Deformation bones only, not other bones. Animation for deformation bones are baked" (glTF 2.0 exporter). The FBX exporter's Armature panel has Only Deform Bones and Add Leaf Bones (turn the second off) (FBX exporter).
Two things to know before you plan around a Rigify game export. First, Rigify splits each limb into "multiple deform bone segments with tweaks", so you'll have more deform bones per limb than a hand-built skeleton, and they're named DEF-upper_arm.L, DEF-upper_arm.L.001 and so on, not mixamorig:LeftArm. Unity's Humanoid avatar needs "at least 15 bones organized in a way that loosely conforms to an actual human skeleton" (Unity manual), and you'll map them by hand in the Avatar configuration. Second, the exported deform hierarchy isn't the simple hips-to-fingers tree that retargeting tools expect, so plan to animate in Blender and bake, rather than dropping Mixamo clips on the exported skeleton.
Route B: a manual armature with IK
Build your own armature when Rigify gives you too much: a low-poly web character that should ship with 17 bones and a 300 KB file, a creature with a body plan no metarig covers, a mech with rigid parts, or a skeleton whose bone names must match an existing animation set exactly. You trade Rigify's controls for total knowledge of every bone.
The minimal biped
| Chain | Bones | Notes |
|---|---|---|
| Spine | hips, spine, chest, neck, head | hips is the root and the only bone without a parent |
| Arm (×2) | shoulder.L, upper_arm.L, forearm.L, hand.L | shoulder can be skipped on very low-poly characters |
| Leg (×2) | thigh.L, shin.L, foot.L | add toe.L if the feet ever bend |
| Non-deforming | foot_ik.L, knee_pole.L, hand_ik.L, elbow_pole.L | Deform unticked, these are targets, not skin bones |
That's 17 deforming bones with shoulders, 15 without, which is exactly Unity's Humanoid minimum. Use the .L suffix on everything on the character's left. Blender's naming conventions accept .L/.R, _L/_R and a few more, and that suffix is what makes mirroring tools work.
Building it
Shift-A > Armaturein Object Mode with the 3D cursor at the world origin. Rename the object and the armature data to something likeArmature_Hero. Set Viewport Display to In Front.Tabinto Edit Mode. Move the single bone's head to the pelvis centre and its tail up to the belly: this iships. Select the tail and pressEto extrudespine,chest,neck,headup the torso. Each bone's tail is the next joint.- Select the
chesttail, extrudeshoulder.Lout to the shoulder joint, thenupper_arm.Lto the elbow,forearm.Lto the wrist,hand.Lto the knuckles. For the leg,Shift-Aa new bone at the hip joint, name itthigh.L, set its Parent tohipsin Bone Properties with Connected off, then extrudeshin.Lto the ankle andfoot.Lto the toes. Give the elbow a slight backward bend and the knee a slight forward bend, for the same reason Rigify wants them. - Add the non-deforming bones.
Shift-Aadds a bone at the cursor. Placefoot_ik.Lat the ankle andhand_ik.Lat the wrist as unparented bones. Placeknee_pole.Labout half a metre in front of the knee andelbow_pole.Labout half a metre behind the elbow. For each, open Bone Properties and untick the Deform checkbox. The manual notes this "also excludes the active bone in the automatic weight calculation" (Deform panel), so these bones won't steal skin. - Fix the rolls. Select all bones,
Shift-N(Armature > Bone Roll > Recalculate Roll, see the Bone Roll page) and pick one Global axis for the whole chain, then turn on the Axes overlay in Armature Properties, Viewport Display, and check that local X points the same way along every bone of a limb. A limb whose bones disagree about roll will twist when the IK solves. - Mirror. Select every
.Lbone and runArmature > Symmetrize. Blender "mirrors selected bones along the X axis using Blender's bone naming convention", creating the.Rside with its constraints and collection assignments mirrored (Symmetrize). Do this after step 7 if you'd rather mirror the IK constraints too.
Adding IK
Blender's IK introduction describes the payoff: IK lets you "position the last bone in a bone chain and the other bones are positioned automatically. This is like how moving someone's finger would cause their arm to follow it."
Ctrl-Tabinto Pose Mode. Clickfoot_ik.L, thenShift-clickshin.Lso the shin is active.- Press
Shift-Iand choose Target Selected Bone (Add IK to Bone). The shin turns yellow: it now carries an Inverse Kinematics constraint targeting the foot control. - In Bone Constraint Properties set Chain Length to 2. The constraint page explains the count: "a value of 2 will rotate the bone and its parent", so the chain is shin plus thigh and stops before the hips. Leaving it at 0 "will include all of the bone's ancestors (up to the root)", which drags the whole spine when you move a foot.
- Set Pole Target to the armature and Bone to
knee_pole.L. The pole "determines the roll of the IK chain, or put differently, the position of the elbow", or here the knee. The leg will likely snap sideways: adjust Pole Angle until the knee points at the pole, which often lands at -90 or 90 degrees. - Repeat for the arm:
hand_ik.Las target onforearm.L, Chain Length 2,elbow_pole.Las pole. - Give
foot.La Copy Rotation constraint targetingfoot_ik.Lso the foot tilts with the control, or simply key the foot directly. - Lock what shouldn't bend. In Bone Properties, Inverse Kinematics, tick Lock on the two shin axes a knee doesn't rotate around, leaving only the hinge axis free, with the manual's caveat that "if a Pole Target is used, IK locking will not work on the root bone" of the chain.
Then bind exactly as in Rigify: select the mesh, Shift-click the armature, Ctrl-P > With Automatic Weights. Because the IK and pole bones have Deform off, they get no vertex groups.
Route C: auto-rigging inside Blender
Auto-rigging means software finds the joints and computes the weights, and you check the result instead of building it. Three options fit a Blender pipeline.
The Cinevva Rig add-on. Install it as a standard Blender extension (Blender 4.2 or newer, Windows, macOS, Linux). Select the mesh, pick the front of the character from four rendered views, choose a body plan, press Rig. About fifteen seconds later the character has a skinned, Mixamo-named humanoid armature and is already playing Idle. Rigging runs on your own machine, offline, after a one-time engine download of about 2.4 GB, with no per-rig charge and no count, unlocked by one $29 key (launch price) that activates up to three machines. The panel reports what it built in plain words, including how many fingers it found. Two more parts come free with the download, no key or account needed: 260 CC0 animation clips (walks, runs, idles, combat, climbing, crawling, emotes) that retarget onto the rigged character inside Blender from a browser docked in the viewport, and an Export card that shows where the file's bytes go, then applies Web, Unity, Unreal or Godot conventions in one click. Against a plain Blender GLB export those presets produced files 68%, 89%, 92% and 98% smaller on four real models. Online rigging exists too, billed in Cinevva credits, for machines that shouldn't hold the engine download.
Auto-Rig Pro. The category leader on Superhive, listed there with more than 65,000 sales, at $50 for the Full edition or $25 for Lite, supporting Blender 2.93 through 5.1 (Superhive listing). Its Smart tool "works for biped characters only, the model must be in T-Pose or A-Pose. It detects the feet, legs, spine, arms, fingers position and optionally the facial bones" (Auto-Rig Pro FAQ). Non-humanoids are rigged by placing reference bones yourself, with Human, Dog, Horse and Bird presets. The Full edition adds the Remap retargeter and an FBX/glTF export module with dedicated settings for Unity, Unreal and Godot. If you rig characters weekly and need a production control rig with bendy bones and a picker, it earns its price. What it doesn't ship is an animation library.
The web Auto Rigger. No install. Upload a GLB, FBX or OBJ up to 50 MB, get a rigged GLB back with clips baked in. Your first rigged character is free to download, which makes it the right way to sanity-check a mesh before you commit an evening to Rigify.
For the Mixamo route, know its status in 2026. Adobe's Mixamo FAQ says "the auto-rigger and animation libraries are for bipedal humanoids only", and the official Mixamo Blender add-on, which builds an IK control rig on a Mixamo skeleton, is offered as a Blender 3.6 version. The community "Mixamo Rig" extension on extensions.blender.org describes itself as a "3rd party upgrade to official addon because it is no longer supported", points to Adobe's version for Blender 3.6, and lists Blender 4.2 LTS compatibility with a 1.2.2 release in April 2026.
Test the rig in 60 seconds
A rest pose hides every weighting problem. Before you animate anything, Ctrl-Tab into Pose Mode and run four checks. They apply to all three routes.
Bend an elbow and a knee to 90 degrees. Select the forearm or shin (or the IK control) and rotate. The inside should crease and the outside should keep its volume. A joint that collapses flat is usually one edge loop where three are needed, a mesh problem more than a weight problem.
Raise both arms overhead. Look at the armpits and the side of the chest. If the ribcage lifts with the arm, chest vertices are weighted to the upper arm. If the armpit tears open, shoulder weights are missing from the underarm.
Squat. Look at the hips and crotch. Trouser legs pierced by the thigh mean the clothing shell got different weights from the leg under it.
Twist a wrist 90 degrees along the forearm. If the forearm narrows to a pinched waist halfway along, that's the candy-wrapper artefact of linear blend skinning. Blender's Armature modifier has a checkbox for it: Preserve Volume, which uses quaternions because without it "rotations at joints tend to scale down the neighboring geometry, up to nearly zero at 180 degrees from rest position". Game engines can't read that checkbox, so a shipped rig fixes the same twist with a forearm twist bone, which is why the manual's own IK example "uses two bones to overcome the twist problem for the forearm".
To fix weights by hand, use the workflow the manual gives on its Vertex Groups for Bones page: put the armature in Pose Mode, make sure Edit > Lock Object Modes is unticked, select the mesh and switch it to Weight Paint Mode, tick Bone Selection in the header, then Alt-click a bone to show its weights (blue is 0, red is 1) and paint. Turn on Auto Normalize in the Tool settings so weights at a joint always sum to one, and reach for the Blur brush before anything else. Since Blender 5.1 you can also loop-select vertices in Weight Paint mode with Vertex Selection on (5.1 release notes), which makes isolating a knee loop quick. When a fix takes longer than ten minutes, our weight painting problems guide covers the seven failures that account for nearly all of them.
Common failures and fixes
"Bone Heat Weighting: failed to find solution for one or more bones". The exact message comes from Blender's mesh Laplacian code, and it means the heat solver couldn't reach some vertices from some bones. Causes, in order of likelihood: overlapping duplicate vertices (Mesh > Clean Up > Merge by Distance), interior faces or non-manifold geometry, a bone entirely outside the mesh, or a mesh so dense the solve gives up. Try again on a lower-resolution copy, or bind with a Decimate modifier temporarily applied. This message is common enough that a paid add-on exists to sidestep it: Voxel Heat Diffuse Skinning ($30 on Superhive, more than 12,500 sales) lists solving this exact error as its first selling point.
The mesh doesn't move at all. The Armature modifier is missing (check the Modifier tab, the Object field should name your rig), or the bones have Deform off, or the vertex group names don't match bone names. Blender's Armature modifier binds by name: "a bone named "forearm", will only affect the vertices in the "forearm" vertex group".
A limb drags the wrong body part. Two bones were too close when the heat solve ran (a hand resting on a thigh, fingers touching). Re-pose the mesh into a proper A-pose and rebind, or paint the stray weight out.
Rigify fingers curl on the wrong axis. Rolls were inconsistent. Select the finger bones in the metarig, Recalculate Roll > Global -Z Axis, regenerate, and if they still rotate wrong, change Bend Rotation Axis under Rigify Type on the first finger bone.
Rigify says it can't overwrite the rig. Unhide both the metarig and the generated rig before pressing Generate Rig. The manual is explicit that both must be visible.
The character is tiny or huge in Blender. You imported at centimetre scale. Scale in Object Mode until Dimensions read about 1.8 m, then Ctrl-A > All Transforms, and rig after that, never before.
The character lies on its back or is 100 times too big in Unity or Unreal. Blender is Z-up and Y-forward. The FBX exporter's Forward and Up axes exist to convert: "Blender uses Y Forward, Z Up. For example, it's common for applications to use Y as the up axis, in that case -Z Forward, Y Up is needed." Unity wants FBX with Forward -Z, Up Y, Apply Scalings set to FBX All. Unreal wants Forward -Y, Up Z, Apply Scalings All Local, Primary Bone Axis Y and Secondary Bone Axis X. Godot's own docs recommend glTF: "glTF 2.0 (recommended)", with FBX supported through ufbx since 4.3 (Godot manual). In every case tick Only Deform Bones and untick Add Leaf Bones. If your pipeline lives on FBX round-trips from Maya or 3ds Max, credit where due: Better FBX Importer and Exporter ($25 on Superhive, more than 12,600 sales) exists because imports stop breaking, and its listing says as much: "If you do everything within Blender, you don't need this add-on."
Your animation vanished after upgrading Blender. Not a rig bug. Blender 4.4 made every Action "slotted", and old files are upgraded automatically with each Action getting one "Legacy Slot" (4.4 release notes). If you assign an existing Action to a new armature, Blender may not auto-pick a slot, so the rig sits still until you select one in the Action Editor. Blender 5.0 also moved bone visibility and selection state onto the pose bone so armature instances stop sharing them (5.0 release notes), a change the notes flag as breaking the Python API for older rig scripts.
Which route should you take?
If you're learning Blender and have an evening, do Rigify once. You'll understand what a rig is, and the control rig it gives you is the best free animation rig there is. Keep the metarig and regenerate as you refine.
If you're building for a web game or a mobile game and every bone costs draw time, build the manual armature. Seventeen bones, your names, your hierarchy, and nothing in the file you didn't put there.
If you have a deadline, a folder of characters, or no interest in rigging as a craft, auto-rig. Inside Blender the Cinevva Rig add-on rigs on your machine for one $29 purchase, plays 260 CC0 clips on the result and exports for your engine. Auto-Rig Pro is the right buy if you want a production control rig with a retargeter and don't mind placing markers. And if you're not sure your mesh will rig cleanly, run it through the free first character on the web Auto Rigger before you spend the evening.
Common Questions
How do I rig a character in Blender?
Prepare the mesh (one shell, A-pose, origin at the feet, Ctrl-A > All Transforms), add a skeleton, bind the mesh, then test. The free built-in route is Rigify: Shift-A > Armature > Human (Meta-Rig), move the bones onto your character in Edit Mode, press Generate Rig in the Armature tab, then select mesh and rig and Ctrl-P > With Automatic Weights. The one-click alternative is an auto-rigging add-on that places and skins the skeleton for you.
How do I use Rigify in Blender?
Enable it under Edit > Preferences > Add-ons, add a metarig from Shift-A > Armature, fit the bones to your mesh with a slight bend at elbows and knees, then click Generate Rig at the bottom of the Armature properties. Rigify creates a separate rig object with IK/FK controls. Bind your mesh to that rig, not the metarig, and keep the metarig so you can regenerate.
Is Rigify good for game rigs?
Yes with one export step. Rigify's control bones, constraints and drivers don't export, so tick Export Deformation Bones only (glTF) or Only Deform Bones (FBX) to ship just the DEF- bones and baked animation. Expect more deform bones than a hand-built skeleton, since limbs are split into segments, and expect to map Unity's Humanoid avatar by hand.
What is the difference between an armature and a rig in Blender?
An armature is the object type: a hierarchy of bones with a rest position you edit in Edit Mode and pose in Pose Mode. A rig is the whole setup built on it: the armature, the constraints and controls that drive it, and the skinned mesh. Rigify's metarig is a plain armature, and the object it generates, called rig, is a rig.
Does Blender have auto rigging?
Blender itself has automatic weights, not automatic bone placement: Rigify still needs you to fit the metarig. Add-ons fill the gap. The Cinevva Rig add-on places and skins a Mixamo-named humanoid skeleton in one click on your own machine for a one-time $29, and Auto-Rig Pro's Smart tool places its markers on humanoids in a T-pose or A-pose.
Does the Mixamo Blender add-on still work?
Adobe's official add-on is offered for Blender 3.6, and the community extension called Mixamo Rig on extensions.blender.org, which describes the official one as "no longer supported", carries it forward with Blender 4.2 LTS compatibility and a 1.2.2 release in April 2026. Mixamo's own auto-rigger remains "for bipedal humanoids only" per Adobe's FAQ.
How do I rig a character in Blender for Unity?
Rig with any route above, make sure the skeleton has the 15 bones Unity's Humanoid avatar needs, then export FBX with Forward -Z, Up Y, Apply Scalings FBX All, Only Deform Bones on and Add Leaf Bones off. In Unity set the Rig type to Humanoid and check the avatar mapping. If the character imports lying down or 100 times too large, you skipped Ctrl-A > All Transforms before rigging.
Related
- How Automatic Rigging Works (and How to Prepare a Model for It): what joints and skin weights are, and the mesh checklist every rigger wants
- Free Character Animations and Auto-Rigging: Mixamo and Its Alternatives: CC0 clip libraries and free riggers, licences checked
- Blender Weight Painting: The 7 Problems Everyone Hits: the bone heat error, bleeding limbs, twisting wrists, and when to skip the step
- Auto-Rig Pro Alternatives for Blender: Rigify, Quick Rig, Voxel Heat and the one-time auto-riggers compared on price and limits
- Cinevva Rig for Blender: one-click rigging on your own machine, 260 CC0 clips, game-ready export presets
- Auto Rigger: rig a GLB, FBX or OBJ in the browser, first character free