How Automatic Rigging Works (and How to Prepare a Model for It)
Last updated: September 2026.
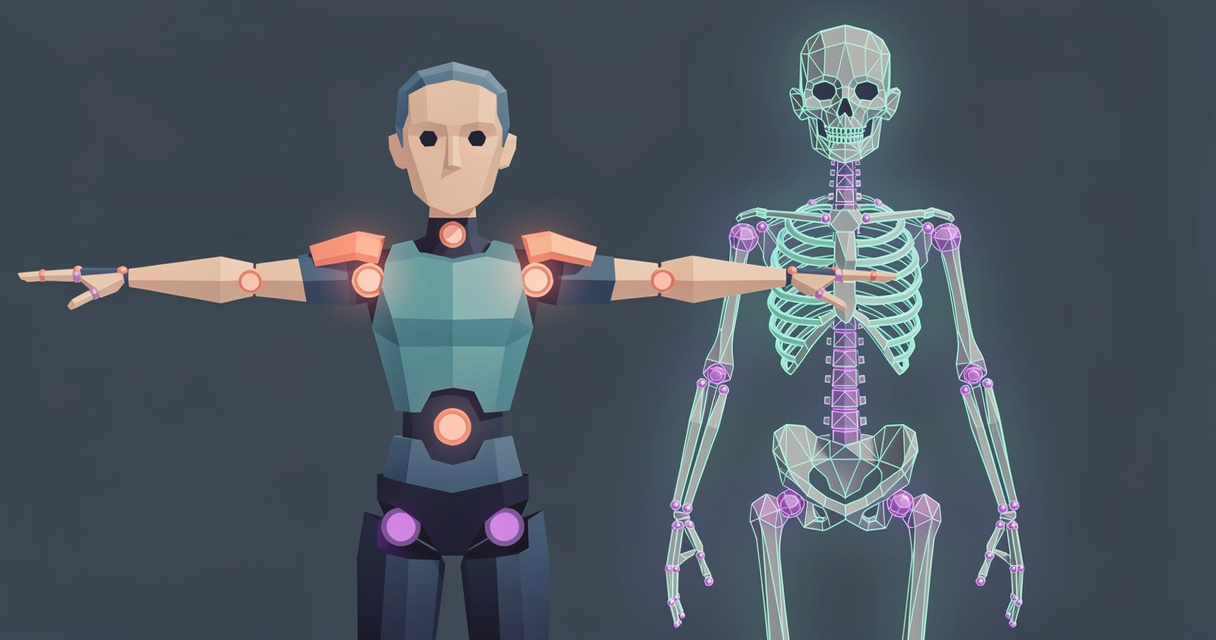
Automatic rigging fits a skeleton inside a static 3D character and works out how much each bone pulls on each vertex, so the mesh bends when the bones move. Every auto rigger, whether it fits a template skeleton to markers (Mixamo, Auto-Rig Pro) or predicts joints with a trained model (RigNet, UniRig, Cinevva's Auto Rigger), wants the same input: one connected mesh in a T-pose or A-pose, at human scale, facing forward, with nothing else in the file. Give it that and a humanoid rigs in under a minute. Give it a posed, multi-shell model with props and you get folded elbows and a floating hat.
Quick answer
- What a rig is: a hierarchy of joints plus, for every vertex, up to four joint indices and weights that sum to one. In glTF that's the
skinsarray and theJOINTS_0andWEIGHTS_0vertex attributes. - How auto riggers place joints: by fitting a template skeleton to landmarks on your mesh, or by predicting joint positions from the geometry with a trained model.
- What to give it: one watertight mesh, T-pose or A-pose, origin at the feet, about 1.8 metres tall, transforms applied, normals outward, no armature, no props.
- How to check it: bend an elbow and a knee, look at the armpits and hips, twist a wrist and watch for the candy-wrapper pinch.
- Fastest route in 2026: upload a GLB, FBX, or OBJ to the Auto Rigger and get a rigged GLB back with animations baked in.
Quick reference
| Route | Joint placement | Input | Output | Non-humanoids | Cost |
|---|---|---|---|---|---|
| Cinevva Auto Rigger | Learned, biped and quadruped | GLB, FBX, OBJ up to 50 MB | Rigged GLB with baked clips | Quadrupeds on the Pro engine | First rig free, then Standard or Pro plan |
| Cinevva Rig for Blender | Same engine, on your machine | Any mesh, Blender 4.2+ | Mixamo-named skeleton | Via the online Pro engine | $29 launch price, unlimited |
| Mixamo | Template, markers you place | FBX, OBJ, ZIP | FBX or DAE | No | Free with an Adobe ID |
| Blender Rigify | Manual metarig placement | Any mesh in Blender | Control rig, Automatic Weights | Cat, Wolf, Horse, Shark metarigs | Free, bundled |
| Auto-Rig Pro | Smart markers, optional AI | Any mesh in Blender | Control rig plus game export | Humanoid focus | Paid add-on, one-time |
| Tripo Auto Rig | Learned, rig-check first | GLB, GLTF, FBX, OBJ, STL up to 150 MB | GLB or FBX | Six creature plans on v2.5 | API credits |
| UniRig | Autoregressive prediction | OBJ, FBX, GLB, VRM | FBX | Humans, animals, objects | Free, MIT code, self-hosted |
What a rig actually is
A skeleton. A tree of joints, each a transform relative to its parent. Move the shoulder and the elbow, wrist, and fingers come along. In glTF the skeleton isn't a separate structure: the glTF 2.0 specification's Skins section says "the joint hierarchy used for controlling skinned mesh pose is simply the node hierarchy", with a skin.joints array naming which nodes are joints. That's why the GLB viewer shows bones as ordinary nodes in the scene graph.
A bind pose. The pose the character held when the skin was attached. glTF stores it as inverseBindMatrices, one MAT4 per joint, "used to bring coordinates being skinned into the same space as each joint". When a downloaded animation folds a character's arms through its chest, this is usually the piece that disagrees.
Skin weights. For each vertex, which joints move it and by how much. glTF puts these in the JOINTS_n and WEIGHTS_n attributes, both VEC4, so each set carries up to four influences per vertex. Weights "MUST NOT be negative" and their sum "SHOULD be as close as reasonably possible to 1.0". A vertex mid-forearm is 100% forearm. A vertex at the elbow crease might be 55% upper arm and 45% forearm, and that blend is what makes the crease bend instead of tear. This is linear blend skinning, the maths every engine runs in its vertex shader, and it has one famous weakness we'll meet at the wrist.
Here is where each piece lives on the character.
Rigging means placing the joints and computing the weights. By hand it's an afternoon per character. Automatically it's seconds to minutes.
How an auto rigger places joints
Template fitting. The tool has one humanoid skeleton and needs to know where your landmarks are. Mixamo asks you: Adobe's rigging help page has you upload an FBX, OBJ, or ZIP, "place the markers on key points (wrists, elbows, knees, and groin)", and confirm, after which rigging "usually takes a few minutes". (Mixamo is still online and free with an Adobe ID as of September 2026, but its help pages date from September 2021 and it had a multi-day outage in June 2025, so keep the rigged file.) Auto-Rig Pro's Smart mode does the same inside Blender, and "an AI model has been implemented in option, to setup automatically the markers". Rigify is the fully manual end: per the Rigify basics page, "meta-rig bones must be moved to correct positions" before you press Generate Rig. Template fitting is predictable and gives you a standard bone set, which is what retargeting wants. It fails when the character doesn't match the template: extra limbs, no neck, a tail.
Learned joint prediction. The tool has seen thousands of rigged characters and predicts where joints belong on yours. RigNet (SIGGRAPH 2020) was the milestone: a network clusters vertices into joint candidates, then separate networks pick the root, decide connectivity, and predict weights. It trained on 2,703 rigged models and needs input remeshed to between 1,000 and 5,000 vertices, a hint at how sensitive these models are to mesh density. UniRig (SIGGRAPH 2025, Tsinghua University and Tripo) collapsed that into one autoregressive transformer that writes the skeleton out as a token sequence, so the tree is valid by construction, then predicts weights with bone-to-point cross attention. Its Rig-XL training set has over 14,000 rigged models across humans, animals, and objects, which is why it handles a dragon where template tools can't. The code is MIT-licensed, with the full Rig-XL checkpoints listed as coming soon. Learned prediction needs no markers and copes with more body plans, but joints land where the training data says joints usually are, so unusual proportions get averaged toward normal.
Cinevva's Auto Rigger is in the second family. It detects whether the upload is a biped or a quadruped, fits a skeleton, and binds the vertices with no markers to place. The Fast engine handles humanoids and is behind the free first download. Quadrupeds and awkward humanoids go to the Pro engine on the Standard and Pro plans. The Blender add-on runs the same Fast engine locally and reports how many bones and fingers it found.
Why the pose and a single mesh matter
Adobe's Mixamo FAQ states the assumptions every rigger shares: the character should have "distinguishable head, body, arm, and leg areas", be "in a default or neutral pose", have "no other content in the file", have "no spaces between any of the parts", and be "centered in the scene". Here's why.
T-pose or A-pose. Marker placement and learned prediction both find limbs by looking for tubes of geometry sticking out of a trunk. Arms at the sides merge into the body and the weights bleed across, so raising the arm drags the ribcage with it. An A-pose (arms down about 45 degrees) often skins the shoulders a little better than a strict T because the armpit is less stretched. Crossed arms or a hero pose don't work, and the rig gets built as if that pose were neutral.
One connected mesh. Weights are computed from distance through the mesh volume, not through the air. Blender's manual describes its Automatic Weights as working "based on the distance from those vertices to a particular bone ('bone heat' algorithm)", and learned riggers use similar geodesic features. A head floating a millimetre above the neck or a glove that is a separate shell is a separate island, and the solver guesses how it connects. Often the glove stays behind when the arm moves.
Side by side, the difference is easy to spot before you upload.
Scale and origin. Rigify says it outright: "Rigify assumes that 1 unit corresponds to 1 meter. So a human is about 2 units tall." Learned riggers trained on characters at roughly human scale too. A character exported from a centimetre-based tool at 180 units tall is outside what any rigger expects, and so is one whose origin sits at the hips.
What breaks, and why
| Problem | What you see | Why |
|---|---|---|
| Multiple meshes or loose shells | A hat or glove stays put when the body moves | Each island is weighted alone and small ones bind to the wrong joint |
| Non-manifold geometry (holes, internal faces, doubled vertices) | Spiky vertices, weights flipping along a seam | Volume-based weighting needs a closed surface to know what's inside |
| Wrong scale or units | Rejected upload, or one joint for the whole body | The model is 100x or 1000x outside the expected size range |
| Inverted normals | Black or see-through patches, confused weights nearby | Inside/outside tests use normals to decide which side is the body |
| Props and accessories in the file | A sword becomes a limb | Mixamo's FAQ: "extra limbs, wings, and tails or large hair and clothing items may not work" |
| Clothing as separate shells | Skirt or coat pokes through the legs | Cloth and body get slightly different weights and drift apart |
| Asymmetry | One arm rigs, the other doesn't | Template riggers mirror one side, so a large asymmetry defeats the mirror |
| Quadruped sent to a humanoid rigger | Front legs become arms, tail ignored | A humanoid template has two arms and two legs |
Clothing shells are the most common real-world failure because generated and marketplace characters are usually built that way. Auto-Rig Pro offers a Voxelized skinning mode for "multiple layers of clothes, props, complex topology" for exactly this reason. If your tool has one mode, merge the clothes into the body first. Quadrupeds are a body-plan question: Mixamo is for "bipedal humanoids only", while Tripo's rigging API has a v2.5-20260210 model for "quadruped, hexapod, octopod, serpentine, aquatic, avian" rigs and Cinevva's rigger sends quadrupeds to its Pro engine.
Prepare your model in 10 minutes
All in Blender, on a copy.
Delete everything that isn't the character. Cameras, lights, the floor, the old armature, any animation. Mixamo's FAQ: "extra helper objects, cameras, or scene objects cause the auto-rigger to not work."
Join and merge. Select every mesh that should deform with the body and join them (Ctrl-J). In Edit Mode select all and run Mesh, Merge, By Distance, which merges "each cluster of vertices that are closer to each other than a certain distance". Start the Merge Distance at 0.0001 m and raise it only if a seam still gapes. Leave a sword out: rig the body, then parent the prop to the hand bone, which the glTF spec allows since "a joint node MAY have other nodes attached to it".
Recalculate normals. Mesh, Normals, Recalculate Outside (Shift-N), which "flips the orientation of the selected faces where necessary, making them all point outward". Turn on the Face Orientation overlay first: red is inside out.
Pose it neutral. If the character came posed, move the arms to a T or A and straighten the legs with a temporary armature or proportional editing. Arms 20 to 30 degrees from the body still rig far better than arms at the sides.
Set origin and scale. Origin at the bottom of the feet, character at world zero. Check Dimensions in the N panel: a human should read 1.7 to 1.9 metres. If it reads 180 or 1800, scale it down.
Apply transforms. Object, Apply, All Transforms (Ctrl-A). The manual's own warning: "It is recommended to apply transforms before rigging and animation." This bakes rotation and scale into the vertices, so the rigger doesn't see a 0.01-scaled object rotated 90 degrees on X, which is how most FBX imports arrive.
Export a GLB. File, Export, glTF 2.0, format glTF Binary (.glb), which the exporter documentation describes as "a single .glb file with all mesh data, image textures, and related information packed into a single binary file". Tick Include, Selected Objects. Leave Transform, +Y Up on. Under Data, Mesh tick Apply Modifiers, UVs, and Normals. Leave Animation off. Open the result in the GLB viewer to confirm one mesh, no skeleton yet, and a size under the Auto Rigger's 50 MB limit. The rigger also takes FBX and OBJ directly, including a zipped OBJ bundle with textures.
Judge a rig in 30 seconds
A rest pose hides everything. Pose it or play a clip instead (the GLB viewer has a Bones overlay and plays baked clips).
Bend an elbow and a knee to 90 degrees. The inside should crease, not fold flat, and the outside should keep its volume. A knee that pinches flat means the weights transition over one vertex loop instead of three or four, a mesh density problem more than a rigger problem.
Raise the arms overhead and look at the armpits, then squat and look at the hips. Three joints meet at each. Bleeding shows as the chest lifting with the arm, and clothing shells show up as a trouser leg the thigh pushes through.
Twist a wrist 90 degrees and watch the forearm. If it narrows to a pinched waist halfway along, that's the candy-wrapper artefact of linear blend skinning: a vertex weighted half to each of two joints gets a blend of a rotated and an unrotated matrix, and the blend shrinks toward the axis. Every auto rigger produces some of it. Forearm twist bones or dual quaternion skinning in the engine hide it.
Play a walk. Feet should plant at contact. Sliding feet usually mean the clip is authored in place and your game is meant to move the character. Sinking or floating feet mean the rig's scale disagrees with the clip's.
If the first four pass, the rig is good enough for a game. If two fail, fix the mesh and rig again rather than painting weights: the second attempt takes a minute, painting takes an hour.
How animations get onto a rig
Animations almost always come from somewhere else: a library, mocap, or a text-to-motion model. Retargeting copies a clip made for one skeleton onto another with different bone names, proportions, and bind pose.
Bone naming is the first hurdle, which is why humanoid conventions matter. Mixamo names its bones mixamorig:Hips, mixamorig:LeftArm and so on, and because so many clips were built for it, "Mixamo-compatible" became a de facto standard: Tripo's API offers a mixamo spec for "Mixamo-compatible bone naming", and Cinevva's Blender add-on outputs a Mixamo-named skeleton. The VRM humanoid specification defines roles instead of names: 15 required bones (hips, spine, head, and the upper leg, lower leg, foot, upper arm, lower arm, and hand per side) plus optional chest, neck, eyes, jaw, toes, and fingers. Unity's Humanoid avatar needs the same "at least 15 bones" and a T-pose. If your rig has those 15, it retargets to almost anything.
Proportions and bind pose are the second hurdle. Copying local rotations between two skeletons whose bones point along different local axes puts the arms out by 90 degrees. Cinevva's Animation Library sidesteps this by solving in world space: for each frame it "works out where the source joint actually is relative to its own bind pose, then puts your joint in the matching place relative to yours". It matches names flexibly (mixamorig:LeftArm, LeftArm, and left_arm all resolve), treats fingers as optional, and retargets 260 CC0 clips onto any humanoid you upload. Prompt Animations does the same for generated motion, mapping a 77-bone source skeleton's 22 body bones onto your character and auto-detecting Mixamo, Tripo, Reallusion CC4, UE5, and generic naming.
Quadrupeds don't get this. There's no sensible mapping from a biped's spine to a dog's, so a four-legged rig comes back from Cinevva's rigger with a walk cycle baked in and no library to browse.
Where auto rigging still fails
Fingers. Twenty small bones in a few centimetres, often modelled as a mitten or with fingers touching. Learned riggers find three fingers on one hand and five on the other, or fuse a thumb to the palm, which is why Cinevva's add-on reports the finger count and the Animation Library treats fingers as optional. Auto-Rig Pro's guidance for finger detection is "fingers spread apart" with "the palm must face the floor".
Faces. No body rigger does facial animation. Expressions come from blend shapes (glTF morph targets) or a separate facial rig, and generated characters usually have neither.
Skirts, capes, coats, long hair. These need physics or their own bone chains. A body rigger weights them to the nearest leg or spine bone, so a skirt bends with the thigh and a cape hangs rigid. Rig the body, then add cloth simulation or chained bones in your engine.
Wings and tails. Humanoid templates have no slot for them. Learned riggers trained on animals (UniRig, Tripo's v2.5 model, Cinevva's Pro engine) do place joints in tails, but wing membranes stay hard because they're thin sheets with joints at the edge. For a mech or anything else that isn't roughly a body, parenting rigid parts to bones by hand still beats asking a solver to skin pistons.
If you work in Blender
The same rigging runs inside Blender through the Cinevva Rig add-on: select the mesh, pick the front view, press Rig, and the skinned, Mixamo-named armature appears on your own model with your materials and modifiers intact. It rigs on your machine, offline, for one $29 purchase (launch price), plays the 260 CC0 clips on the result, and exports with presets for Unity, Unreal, Godot and the web. Blender 4.2 and newer on Windows, macOS and Linux. The Blender rigging how-to covers Rigify and manual armatures alongside it.
Common Questions
What is rigging in 3D?
Rigging is adding a skeleton to a 3D model and binding the mesh to it so the model can be posed and animated. The skeleton is a hierarchy of joints, and the binding is a set of skin weights saying how much each joint moves each vertex. In glTF that's a skins entry plus JOINTS_0 and WEIGHTS_0 attributes on the mesh.
How does automatic rigging work?
An auto rigger locates a character's joints from its geometry, either by fitting a template skeleton to landmarks or by predicting joint positions with a model trained on thousands of rigged characters, then computes skin weights from how each vertex sits relative to the bones. Cinevva's Auto Rigger does this in the browser for humanoids and quadrupeds, with no bone placement or weight painting.
How do I prepare a model for auto rigging?
One connected mesh, T-pose or A-pose, about 1.8 metres tall, origin at the feet on the world origin, facing forward, transforms applied, normals outward, and nothing else in the file. In Blender: join, Merge by Distance, Recalculate Outside, Apply All Transforms, then export a GLB with Selected Objects and Apply Modifiers on.
Can I rig a 3D model online?
Yes. Cinevva's Auto Rigger rigs a GLB, FBX, or OBJ up to 50 MB in the browser and returns a rigged GLB, with your first character free to download including up to six baked animations. Mixamo rigs humanoids online for free with an Adobe ID and exports FBX or DAE. Tripo's hosted rigger runs on API credits.
What are skin weights?
Skin weights are the per-vertex numbers that say how strongly each joint moves that vertex. glTF allows up to four joints per vertex per attribute set, weights can't be negative, and they should sum to 1.0. A mid-forearm vertex is weighted entirely to the forearm joint. An elbow vertex is split between upper arm and forearm, which is what makes the elbow crease smoothly instead of tearing.
Does auto rigging work on animals and quadrupeds?
Only if the rigger has a quadruped body plan. Mixamo is "bipedal humanoids only" per Adobe's FAQ. Cinevva's Auto Rigger detects a quadruped and rigs it on the Pro engine with a walk cycle baked in, Tripo's v2.5 model covers six creature plans, and Rigify ships Cat, Wolf, Horse, and Shark metarigs you fit by hand. Expect to animate the result yourself, since the big free clip libraries are humanoid.
Related
- Free Character Animations and Auto-Rigging: Mixamo and Its Alternatives: the roundup of free riggers and CC0 animation libraries, licences checked
- Best Free Rigged 3D Character Models: skip rigging with characters that already have a skeleton
- Best AI 3D Model Generators: which text-to-3D and image-to-3D tools produce meshes that rig cleanly
- Best AI Animation Generators for 3D Characters: text-to-motion tools to put clips on your new rig
- Best Free 3D Model Sites for Games: where to find characters worth rigging
- Game Asset Licenses Explained: what you can ship from each rigger and library