Blender Weight Painting: The 7 Problems Everyone Hits, How to Fix Them, and How to Skip the Step
Last updated: September 2026.
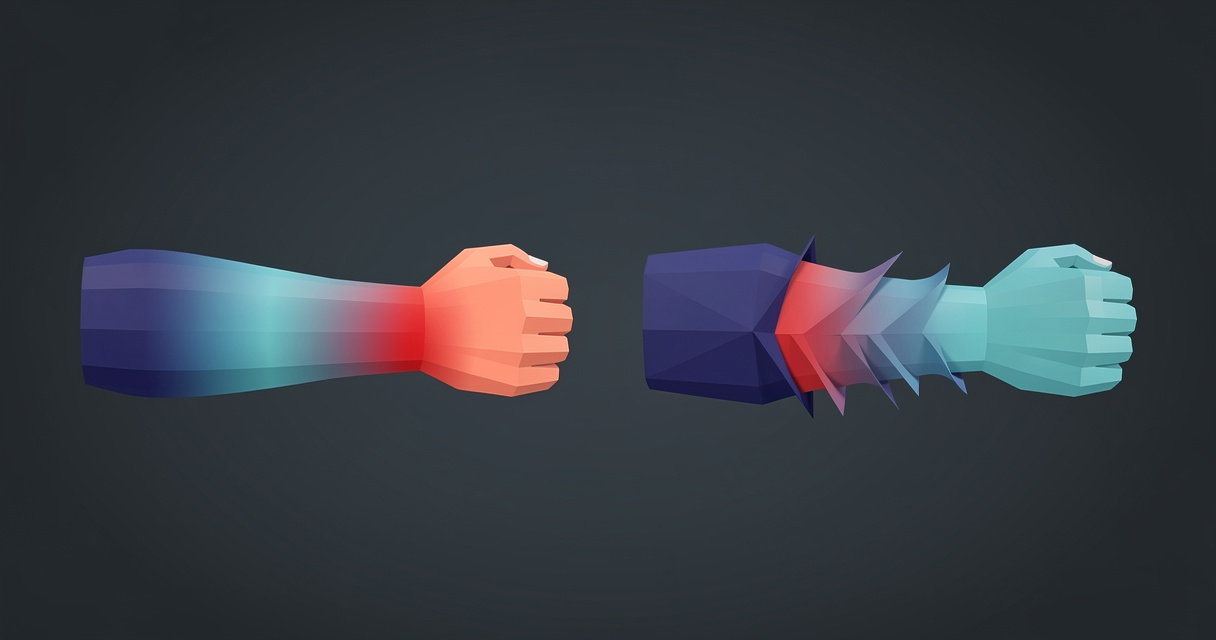
Nearly every weight painting problem in Blender is one of seven: automatic weights refuse to run, weights bleed from one limb into another, a vertex has more than four bones pulling on it, weights don't add up to one, the two sides don't match, a wrist collapses when it twists, or a jacket stays behind when the body moves. Each has a specific tool in the Weights menu of Weight Paint Mode (Normalize All, Clean, Limit Total, Smooth, Mirror Vertex Group, Transfer Weights) or a modifier setting, and this guide gives the exact path for each. If you'd rather not paint at all, two add-ons skin a character for you, and we cover both at the end.
Quick answer
- Automatic weights fail with
Bone Heat Weighting: failed to find solution for one or more bones: clean the mesh.Mesh > Clean Up > Merge by Distance,Degenerate Dissolve,Delete Loose, thenSelect > Select All by Trait > Non Manifold. Rig one connected body, attach clothes afterwards. - Weights bleed into the wrong limb: select the affected faces, then
Weights > Assign Automatic from Bonesfor only the bones that should own them, or paint them out and runWeights > SmoothandWeights > Clean. - Too many bones per vertex:
Weights > Limit Totalwith Limit 4, thenWeights > Normalize All. - Weights don't sum to one:
Weights > Normalize Allwith Lock Active off, then Auto Normalize on in the tool options. - One side is right, the other isn't:
Weights > Mirror Vertex Groupwith Mirror Weights and Flip Group Names, or paint with Mirror Vertex Groups on in the Symmetry panel. - Candy-wrapper wrist: Preserve Volume on the Armature modifier for renders, twist bones for a game engine.
- Clothing doesn't follow the body: a Data Transfer modifier on the clothing, Vertex Groups, Nearest Face Interpolated, source set to the body.
- Skip the step: Voxel Heat Diffuse Skinning (about $30) skins meshes Blender's solver rejects. The Cinevva Rig add-on ($29 launch price, runs offline on your own machine, Blender 4.2+ on Windows, macOS and Linux) places the skeleton and the weights together.
Quick reference
| Problem | What you see | The fix | Where |
|---|---|---|---|
| Automatic weights fail | Bone Heat Weighting: failed to find solution for one or more bones | Merge by Distance, Degenerate Dissolve, Delete Loose, fix non-manifold edges, rig the body alone | Edit Mode, Mesh > Clean Up, Select > Select All by Trait |
| Weights bleed | Raising an arm lifts the ribs, a hand drags the hip | Assign Automatic from Bones on a face selection, then Smooth and Clean | Weight Paint Mode, Weights menu with face masking |
| More than 4 influences | Engine or viewer deforms differently from Blender | Limit Total 4, then Normalize All | Weight Paint Mode, Weights menu |
| Un-normalized weights | Looks fine in Blender, wrong after export | Normalize All (Lock Active off), Auto Normalize on | Weights menu, tool Options panel |
| Asymmetric weights | Left bends cleanly, right doesn't | Mirror Vertex Group with Flip Group Names | Weights > Mirror Vertex Group |
| Candy-wrapper twist | Forearm pinches to a point when the wrist rotates | Preserve Volume, or twist bones | Armature modifier, or the rig |
| Clothing shells | Jacket or skirt stays behind, legs poke through | Data Transfer modifier, Vertex Groups, Nearest Face Interpolated | Modifier on the clothing object |
What skin weights are, in one paragraph
Every vertex on a character carries a small list: which bones move it and by how much. Blender stores that list as vertex groups named after bones, one weight per vertex per group, and the Armature modifier reads them: "a bone named 'forearm', will only affect the vertices in the 'forearm' vertex group. The influence of one bone on a given vertex is controlled by the weight of this vertex in the relevant group." Weight Paint Mode is a way to see and edit those numbers as colour. The manual's colour code: "areas of low value (with weights close to 0.0) are displayed as blue (cold) and areas of high value (with weights close to 1.0) are displayed as red (hot)", with green and yellow in between.
A good joint is a short gradient. A bad joint is either a hard step, which folds like paper, or a gradient that reaches somewhere it shouldn't.
See what you've got before you fix anything
Set up the view the way the manual's workflow describes: select the armature, Ctrl-Tab into Pose Mode, then select the mesh and switch to Weight Paint Mode. Edit > Lock Object Modes in the topbar must be unchecked or the second step fails. In the viewport header tick Bone Selection, then Alt-LMB a bone to show its vertex group on the mesh. Bones hide inside the body, so turn on In Front for the armature in its Viewport Display settings.
Then open Viewport Overlays and set Zero Weights to All. Per the overlay docs, vertices "are shown in black if they have no weight in any vertex group". Those are the vertices that stay behind when the character moves.
Problem 1: Automatic weights fail
You press Ctrl-P, choose Armature Deform > With Automatic Weights, and Blender answers:
Bone Heat Weighting: failed to find solution for one or more bones
That string lives in Blender's source, in source/blender/editors/armature/meshlaplacian.cc, and the function around it tells you what went wrong. Automatic weights treat each bone as a heat source and solve a diffusion problem over the mesh surface, which the manual describes as influence "based on the distance from those vertices to a particular bone ('bone heat' algorithm)". Two details from the code matter: the mesh is triangulated first ("bone heat needs triangulated faces"), and a bone only heats a vertex it can see, tested with a ray cast against the mesh. The error fires when the linear solve for a bone fails, and it fails when the mesh hands it a degenerate system. In practice that means one of these:
- Doubled vertices and zero-area faces. Common after FBX or OBJ import, or a Boolean. In Edit Mode select all, then
Mesh > Clean Up > Merge by Distance(the manual: "Merges the selected vertices that are closer to each other than a certain distance"), thenMesh > Clean Up > Degenerate Dissolve, which "Collapses any selected edges that are shorter than a certain length. This also results in the removal of small faces." - Loose geometry.
Mesh > Clean Up > Delete Loose. - Non-manifold edges and interior faces.
Select > Select All by Trait > Non Manifoldselects "edges that do not belong to any face", "edges at boundaries and holes", and "edges that belong to three or more faces".Select > Select All by Trait > Interior Facesfinds "faces that may have been accidentally created inside the mesh instead of on the mesh's surface". Fix what lights up. A hole with a bone poking through it is a problem, andMesh > Clean Up > Fill Holescloses it. - Many separate shells. A character assembled from body, hair, eyes, teeth, boots and belt as separate islands is the classic trigger, and the reason the Voxel Heat Diffuse Skinning add-on exists. Rig the body alone first and attach the rest with the Data Transfer method in Problem 7, or join the pieces with
Ctrl-Jand Merge by Distance. - Scale. Rigify's documentation states the assumption plainly: "Rigify assumes that 1 unit corresponds to 1 meter. So a human is about 2 units tall." A 180-unit character is far outside that. Scale mesh and armature,
Object > Apply > All Transforms, then parent again.
If the error persists, split the problem: select part of the mesh with face selection masking and run Weights > Assign Automatic from Bones for a few bones at a time. Every tool on the Weight Paint tools page works "with Vertex Selection Masking and Face Selection Masking", so you can find the one region that breaks the solve.
Problem 2: Weights bleed across limbs
The arm goes up and the ribcage comes with it. The thigh bends and the crotch of the trousers folds inward. The hand bone grabs a patch of hip because the hand rested near the hip in the bind pose. The manual is blunt about the cause: automatic weights "can often lead to armatures which do not deform child objects in ways you would want. Overlaps can occur when it comes to determining which bones should influence certain vertices".
The cleanest fix reruns the solver on a subset. In Weight Paint Mode turn on face selection masking, select the faces that should belong to the arm (and only those), select the arm bones in Pose Mode, then Weights > Assign Automatic from Bones. Per the manual this applies "from the selected bone(s) to the vertex group the same 'auto-weighting' methods as available in the Parent armature menu", but now the chest faces aren't in the selection, so nothing can bleed onto them. Repeat per limb.
For smaller bleeds, paint. Set the brush's Blend to Subtract with a low Strength, or hold Ctrl with the Draw brush to subtract, and brush the stray weight off the chest while the arm bone is active. Then Weights > Smooth, which "blends the weights of selected vertices based on the average of adjacent vertices". Factor 0.5 and two or three Iterations is a good start. Then Weights > Clean to drop the near-zero residue that Smooth leaves behind (details in the export checklist below).
The two checks that stop bleeding before it starts: pose the character so limbs are apart (a T-pose or A-pose, with a gap between hand and hip), and don't rig a mesh whose arms touch its sides. Our automatic rigging guide covers the pose and single-mesh preparation in detail.
Problem 3: More than four bones per vertex
Blender doesn't care how many groups a vertex belongs to. Game engines do. The glTF 2.0 specification stores skinning in JOINTS_0 and WEIGHTS_0 attributes and says "The number of joints that influence one vertex is limited to 4 per set". More than four means a second set (JOINTS_1, WEIGHTS_1), which many runtimes ignore. Unity's Skinned Mesh Renderer offers Skin Weights of 1 Bone, 2 Bones, 4 Bones or Auto, and warns that "If you import a custom number of skin weights and you want to allow more than four bones of influence, you must choose this option and make sure you set Skin Weights to Unlimited". Blender's own glTF exporter has a Bone Influences setting with the note "Models may appear incorrectly in many viewers with value different to 4 or 8".
So a vertex with six influences in Blender is silently truncated on export or on import, and the character deforms differently in the engine than in your viewport. Automatic weights produce six or seven influences routinely around the shoulders, hips and fingers.
The fix is two clicks. Weights > Limit Total, Limit 4. The manual: "Reduce the number of weight groups per vertex to the specified Limit. The tool removes lowest weights first until the limit is reached." Then Weights > Normalize All, because removing the smallest weights leaves the remaining ones summing to less than one.
Problem 4: Weights don't add up to one
This one hides. The manual's normalized weight workflow explains why: "The Armature modifier in Blender does this automatically, so it is technically not necessary to ensure that weights are normalized at the painting stage." A vertex whose weights sum to 0.6 or 1.7 deforms correctly in Blender. The glTF spec says weights' "linear sum SHOULD be as close as reasonably possible to 1.0 for a given vertex" and explains the stakes: "an error of 1/255 in the weight sum would result in an unacceptably large difference in the joint position." Don't count on an exporter to fix this quietly.
Weights > Normalize All. The manual: "For each vertex, this tool makes sure that the sum of the weights across all vertex groups is equal to 1. This tool normalizes all of the vertex groups, except for locked groups". Untick Lock Active unless you want the active group kept and everything else rebalanced around it. Then, in the tool settings, turn on Auto Normalize, which "Ensures that all deforming vertex groups add up to one while painting." From then on every stroke redistributes weight among the unlocked groups instead of adding on top.
Don't confuse Normalize All with Weights > Normalize, which "only works on the active vertex group" and scales it so "the highest weight value is 1.0".
Locking is the companion skill. Lock a group with the padlock in the Vertex Groups panel or the K pie menu, and Auto Normalize will "redistribute only between the unlocked groups". That's how you fix a shoulder without disturbing a chest you've already got right.
Problem 5: The two sides don't match
You painted the left arm for an hour and the right arm is still the raw automatic result. Weights > Mirror Vertex Group copies one side to the other, with two conditions from the manual. First, "Mirroring only works when the object's rest pose is perfectly symmetrical across the X axis." If your mesh is only nearly symmetric, tick Topology Mirror, which is "for meshes which are not fully symmetric (approximate mirror)". Second, "the weights are not transferred to the corresponding opposite bone weight group" unless you tell it to, which is what Flip Group Names does: it swaps assignments between groups with symmetrical names "(with components like 'L', 'R', 'right', 'left')". Tick Mirror Weights, Flip Group Names and All Groups to do the whole character at once.
That depends on your bones being named for it. The naming conventions page accepts hand_L and hand_R, hand.l and hand.r, handLeft and handRight, and the same with the side prefixed, but not handL with no separator. Mixamo-style LeftHand and RightHand work. An armature with Bone_012 names has to be renamed first, since mirroring can't know which bone pairs with which.
To avoid the problem, paint symmetrically from the start. In the Tool settings, Symmetry panel, tick Mirror Vertex Groups, which the manual describes as "mirrored painting on groups that have symmetrical names". Every stroke on the left arm now lands on the right arm's group too.
Problem 6: The candy-wrapper wrist
Twist a wrist 90 degrees and the forearm narrows to a pinched waist halfway along. This isn't a painting mistake. It's the mathematics of linear blend skinning: a vertex weighted half to the forearm and half to the hand gets the average of a rotated and an unrotated transform, and that average collapses toward the axis. The Armature modifier's Preserve Volume option swaps in quaternion blending, and the manual describes the trade exactly: "Without it, rotations at joints tend to scale down the neighboring geometry, up to nearly zero at 180 degrees from rest position. With it, the geometry is no longer scaled down, but there is a 'gap', a discontinuity when reaching 180 degrees from rest position."
Tick Preserve Volume for renders inside Blender. For a game, know that it's a modifier setting, not mesh data, and glTF and FBX don't carry it. Engines skin linearly unless you switch them to something else, so the pinch comes back on import. The fixes that survive export are the old ones: a forearm twist bone (or two) that splits the rotation into smaller steps, each with its own gradient, or spreading the wrist weights over more edge loops so no vertex sits at the 50/50 point.
The Smooth Corrective modifier is the other in-Blender tool, "typically useful after an Armature modifier, where distortion around joints may be hard to avoid, even with careful weight painting." Same caveat: it deforms in Blender and doesn't export as weights.
Problem 7: Clothing shells don't follow the body
You rigged the body and it moves well. The jacket, a separate mesh, either got its own bad automatic weights (the thigh pushes through the trouser leg because body and cloth blended slightly differently) or never got weights at all and hangs in the air. The right answer is to give the clothing the body's weights, not its own.
Add a Data Transfer modifier to the clothing object. Set Source to the body, tick Vertex Data, choose Vertex Groups, set the mapping to Nearest Face Interpolated, and click Generate Data Layers. The manual warns this button matters: "The modifier doesn't do this automatically, so make sure to click this button (or add the missing layers yourself) as the transfer may not work otherwise." Nearest Face Interpolated finds "the nearest point on the nearest source face, then use that point to interpolate between the values" of that face's vertices, which is what you want for a shell that sits a few millimetres off the skin. Set Layer Mapping to By Name so LeftArm on the body feeds LeftArm on the jacket. Then add an Armature modifier below it pointing at the same armature. Apply the Data Transfer modifier before export so the weights become real vertex groups.
The same thing exists as an operator: in Weight Paint Mode, select the body, then the clothing (active), Weights > Transfer Weights, and in the Adjust Last Operation panel set Source Layers Selection to By Name. The manual notes the objects "must be at the same location. If they are placed side-by-side, then the weight transfer will not work."
Where the shell is thick (a heavy coat, armour) rather than skin-tight, transferred weights still beat automatic ones, because they can't disagree with the body underneath.
Clean weights for game export, in order
Do these in Weight Paint Mode with no face or vertex masking active, so each tool touches the whole mesh.
- Delete groups that aren't bones. In the Vertex Groups panel, remove any group that doesn't match a deforming bone. The Armature modifier docs note "Removing empty vertex groups helps to reduce dependencies".
- Fix bleeding and asymmetry first (Problems 2 and 5). The tools below don't know a stray weight from a correct one.
Weights > Limit Total, Limit 4. For glTF, three.js, Babylon.js, Unity at default settings and most mobile targets. If your engine and export are both set for eight, use 8.Weights > Normalize All, Lock Active off. Sums are back to 1.0 after Limit Total removed the tail.Weights > Clean, Limit 0.001, Keep Single on. Clean "unassigns vertices from Vertex Groups whose weights are below the Limit". A weight of 0.0004 does nothing visible but still occupies one of the four slots. Keep Single guarantees "each vertex will keep at least one weight". glTF commonly stores weights as normalized bytes, where the smallest step is 1/255, so anything under 0.004 rounds to nothing anyway.Weights > Normalize Allagain. Clean can leave a vertex at 0.999.- Check Zero Weights. Overlay set to All, look for black.
- Export. In the glTF exporter, Data, Skinning, leave Bone Influences at 4 and Include All Bone Influences off. Data, Armature, tick Use Rest Position Armature so the bind pose is the rest pose, not the current frame.
Skip the step
People pay to not do this. Two products prove it in different ways.
Voxel Heat Diffuse Skinning by Mesh Online is the add-on Blender users buy when automatic weights refuse. Its Superhive listing shows an Indie licence at $30, more than 12,500 sales, and support for Blender 3.6 through 5.1 as an extension. The listing leads with the exact problem: "Blender throws a message: 'bone heat weighting: failed to find solution for one or more bones'." Its method is what the name says. Blender's built-in solver diffuses heat across the surface, which is why it needs a clean surface. This add-on voxelizes the character into a solid and lets "heat diffuse in the solid statue", so a character built from twenty overlapping shells skins as one body. The author is honest about the trade-off: the built-in surface method "can get much better result in detailed areas such as fingers and toes", so the add-on combines both. It wants at least 8 GB of memory. If your mesh is a mess and you want Blender's own skeleton, this is the one to buy.
The Cinevva Rig add-on takes the other route: don't fix the weights, don't place the bones either. Select a mesh, press Rig, and it places a Mixamo-named humanoid skeleton and skins it in one pass, with the weights already limited, normalized and cleaned for engines. It runs on your own machine, offline, after a one-time engine download of about 2.4 GB, for a single $29 launch-price purchase with no per-rig charge, on Blender 4.2 and newer for Windows, macOS and Linux. It also carries 260 CC0 animation clips that retarget onto the result inside Blender, and free Web, Unity, Unreal and Godot export presets that set Bone Influences, rest pose, axes and scale for you. It doesn't replace weight painting for a custom skeleton, a tail, or a face rig. It replaces it for the humanoid you need in a game by Friday. The Blender add-on page has the details.
For one character without opening Blender, the web Auto Rigger takes a GLB, FBX or OBJ up to 50 MB and returns a rigged GLB, first character free, already in the four-influence, sum-to-one shape this guide spends its middle third reaching.
Rigify is the free option, bundled with Blender, and its documentation sets expectations fairly: "Usually armature deform with automatic weights do a really good job out of the box if you correctly place your bones (and there is enough topology to work with!)." The parenthesis is the whole story of this article.
Common Questions
Why is Blender weight paint not working?
Usually one of three things. You're painting on the wrong vertex group, so Alt-LMB the bone with Bone Selection on and check the active group in the header. The armature isn't in Pose Mode, or Edit > Lock Object Modes is ticked. Or face selection masking is on and you're painting outside the selection. The Zero Weights overlay shows which vertices have any weight at all.
How do I fix "Bone Heat Weighting: failed to find solution for one or more bones"?
Clean the mesh in Edit Mode: Mesh > Clean Up > Merge by Distance, Degenerate Dissolve, Delete Loose, then Select > Select All by Trait > Non Manifold and fix what lights up. Make the character about 2 metres tall with transforms applied, and rig a single connected body before attaching clothes. If it still fails, the Voxel Heat Diffuse Skinning add-on skins non-watertight meshes without the bone heat solver.
How do I mirror weight paint in Blender?
Weights > Mirror Vertex Group with Mirror Weights, Flip Group Names and All Groups ticked, plus Topology Mirror if the mesh isn't perfectly symmetric. It needs a symmetrical rest pose across X and bones named in pairs like hand.L and hand.R. To paint both sides at once, tick Mirror Vertex Groups in the Symmetry panel of the tool settings.
How do I normalize weights in Blender?
Weights > Normalize All makes every vertex's weights sum to 1 across all unlocked groups. Turn Lock Active off unless you want the active group preserved. Then enable Auto Normalize in the tool Options so new strokes keep the sum at 1. Plain Weights > Normalize is different: it scales only the active group so its maximum is 1.0.
How do I smooth weight paint in Blender?
Enable vertex selection masking, select the vertices around the joint, and run Weights > Smooth. Factor controls how far each weight moves toward the average of its neighbours (0.5 is a good start), Iterations repeats the pass, and Expand/Contract grows or shrinks the affected area. Follow it with Weights > Clean at a small Limit, then Normalize All.
Why does my mesh deform wrong in Blender when I move a bone?
Either the wrong vertices belong to that bone's group (bleeding, fixed with Weights > Assign Automatic from Bones on a face selection or by painting them out), or the transition across the joint is too abrupt (Weights > Smooth), or the bone sits in the wrong place inside the mesh so the automatic weights were wrong from the start. Check Zero Weights too: vertices in no group stay put while everything around them moves.
What is the difference between heat weighting and voxel heat diffuse skinning?
Blender's bone heat weighting diffuses each bone's influence across the mesh surface, so it needs a clean, connected surface. Voxel heat diffuse skinning fills the character's volume with voxels and diffuses through the solid, so it doesn't care whether the mesh is watertight or built from separate shells. The Voxel Heat Diffuse Skinning add-on (about $30 on Superhive) brings that method to Blender and combines both for fine details like fingers.
Related
- How Automatic Rigging Works (and How to Prepare a Model for It): the mesh preparation that prevents most weight problems before they start
- How to Rig a Character in Blender: the full rigging walkthrough this guide plugs into
- Free Character Animations and Auto-Rigging: where to get CC0 clips for the rig once it deforms properly
- Cinevva Rig for Blender: bones and weights in one pass, local and offline, with game export presets
- Auto Rigger: rig one character in the browser, first one free
- GLB Viewer: check the exported skin and play the clips outside Blender