Blender to Unity Export Checklist: Scale, Axes, Bones, and Animations That Land Right (2026)
Last updated: September 2026.
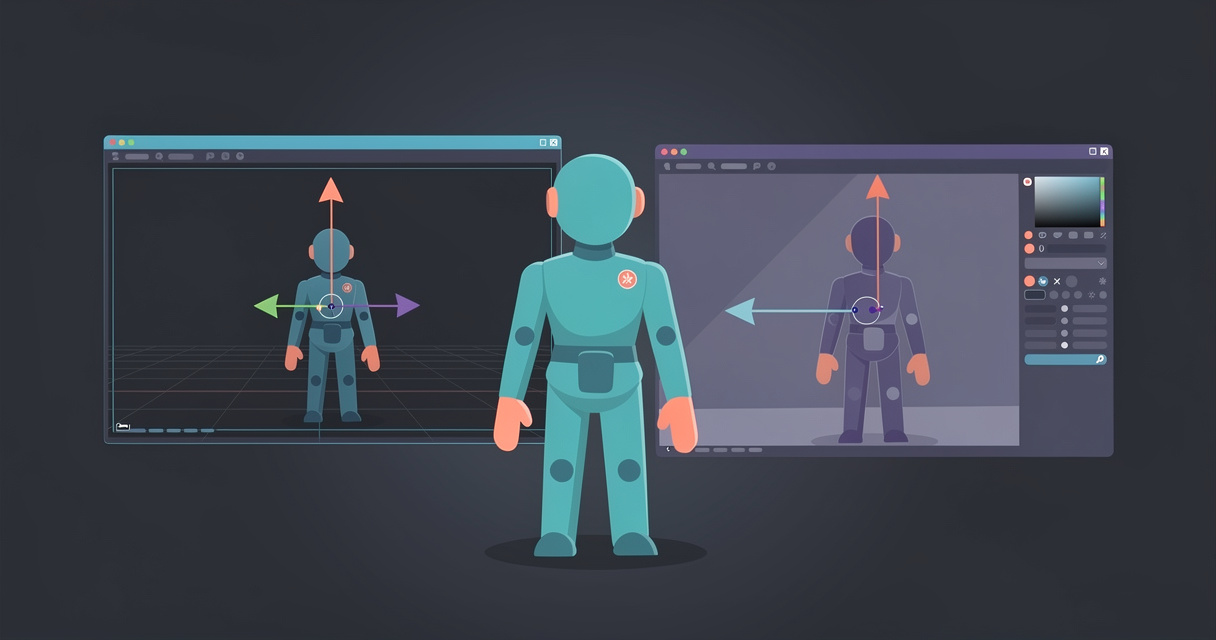
To get a Blender model into Unity at the right size, facing the right way, with a rig Unity can read, export FBX from File > Export > FBX (.fbx) with Apply Scalings set to FBX Units Scale (or FBX All), Forward -Z and Up Y, Apply Unit on, Add Leaf Bones off, Smoothing set to Face, and Path Mode Copy with Embed Textures on. Don't drop the .blend file into Assets, and keep glTF for static props until Unity's glTFast importer plays animation without extra work. Everything below explains why each setting matters, what it looks like when it's wrong, and how to fix it on either side.
Quick answer
- Format: FBX for anything rigged or animated. glTF (.glb) only for static props, and only after installing the
com.unity.cloud.gltfastpackage. Never the raw .blend. - Scale: Blender Scene Properties, Unit System Metric, Unit Scale 1.0. In the exporter, Scale 1.00, Apply Scalings FBX Units Scale, Apply Unit ticked. In Unity, Scale Factor 1 and Convert Units ticked. A 1.8 m character should read 1.8 units tall with a scale of 1 on every transform.
- Axes: Forward -Z, Up Y in the exporter (the defaults). In Unity's Model tab, tick Bake Axis Conversion so the -90 on X disappears from the root transform.
- Bones: untick Add Leaf Bones. Tick Only Deform Bones if you export a Rigify or Auto-Rig Pro control rig. Model in a T-pose and name bones after body parts so the Humanoid Avatar maps itself.
- Animation: one Action per clip, or one NLA strip per clip. Leave NLA Strips and All Actions on, Key All Bones on, Sampling Rate 1. In Unity the clips appear in the Animation tab, one per FBX AnimStack.
- Textures: Path Mode Copy, Embed Textures on. In Unity's Materials tab press Extract Textures, then Extract Materials. Pink means the shader doesn't match your render pipeline, not that the texture is missing.
Quick reference
The Blender FBX exporter settings that matter for Unity, with the value to use and the reason. Option names and descriptions come from the Blender manual and the exporter's source.
| Panel | Setting | For Unity | Why |
|---|---|---|---|
| Include | Selected Objects | On | Cameras, lights and reference planes shouldn't ship |
| Include | Object Types | Armature, Mesh (Empty if you use locators) | Cameras and lights import as Unity components you'll delete |
| Transform | Scale | 1.00 | Any other value bakes a mystery multiplier into the file |
| Transform | Apply Scalings | FBX Units Scale or FBX All | Puts the metre-to-centimetre factor in the file header, not on every object |
| Transform | Forward / Up | -Z Forward, Y Up | Unity is Y up, Z forward |
| Transform | Apply Unit | On | Honours your Scene unit settings |
| Transform | Use Space Transform | On | Writes the axis conversion into object rotations |
| Transform | Apply Transform | Off | The exporter itself says it is broken with armatures and animation |
| Geometry | Smoothing | Face | Unity needs smoothing groups for blend shape normals |
| Geometry | Apply Modifiers | On | Exports the evaluated mesh (mirror, subdivision, triangulate) |
| Armature | Primary / Secondary Bone Axis | Y / X (defaults) | Unity doesn't care, but retargeting tools do |
| Armature | Armature FBXNode Type | Null | Default, imports as an empty root GameObject |
| Armature | Only Deform Bones | On for control rigs, off for plain armatures | Keeps IK targets and widgets out of the skeleton |
| Armature | Add Leaf Bones | Off | Otherwise every chain ends in a _end bone Unity shows |
| Bake Animation | Key All Bones, NLA Strips, All Actions, Force Start/End Keying | All on | One AnimStack per clip, every bone keyed |
| Bake Animation | Sampling Rate / Simplify | 1.0 / 1.0 | A key per frame, light curve cleanup |
| Main | Path Mode / Embed Textures | Copy / On | Textures travel inside the .fbx |
Don't drop the .blend into Assets
Unity will accept a .blend file, and that's the trap. Unity's proprietary format page explains what happens: "You need to have the 3D modeling software installed to import proprietary files directly into Unity", and "the first time you import a proprietary file into Unity, the 3D modeling software has to launch in a command-line process." Unity is running Blender's FBX exporter in the background with settings you don't control, so you get the exporter's defaults, including the leaf bones and the scale layout that produce most of the problems on this page.
The same page lists what the .blend route can't do: "Textures and diffuse color are not assigned automatically", and "Blender does not export the visibility value inside animations in the FBX file." Unity's 3D formats page adds the team problem: assets saved as .blend "fail to import unless you have the corresponding 3D modeling software installed on your computer", so "everybody working on your Unity project must have the correct software installed", including your build machine. Unity's own verdict: "It's best practice to use the .fbx file format whenever possible, and not use proprietary model file formats in production."
Keep the .blend in a source folder outside Assets (or in a folder ending in ~, which Unity ignores) and export FBX into Assets.
FBX or glTF for Unity in 2026
FBX. Unity's importer reads .fbx, .dae, .dxf and .obj natively, and its 3D formats page doesn't mention glTF at all. glTF support comes from Unity glTFast, a package you add through Window > Package Manager > Add package by name with com.unity.cloud.gltfast. It's an official Unity package since December 2023, at version 6.17.0 as of March 2026, and its installation page says the Editor installs the latest version plus dependencies. Once it's in, dropping a .glb into Assets works through a ScriptedImporter, and it supports Built-in, URP and HDRP.
Three things stop it being the default for characters. Its features page lists animation as fully supported only "via legacy Animation System", and for Mecanim says "Animation clips can be imported Mecanim compatible, but they won't be assigned and cannot be played back without further work." Draco, KTX2 and Meshopt each need another package (com.unity.cloud.draco, com.unity.cloud.ktx, com.unity.meshopt.decompress). And Unity's texture importer reads BMP, EXR, GIF, HDR, IFF, JPG, PICT, PNG, PSD, TGA and TIFF, not WebP, which is why glTFast 6.17 added an explicit error for WebP images. A GLB tuned for the web (WebP textures, Draco) is the wrong file for Unity.
glTF earns its place for static props and for anything loaded at runtime from a server, where glTFast is excellent. For a rigged, animated character going into an Animator Controller, export FBX. If you already have a GLB, the GLB viewer shows you what's in it, and Blender imports it cleanly for a re-export.
Scale: why the model arrives 100x too big, or with 0.01 on everything
FBX measures in centimetres, Blender in metres. The exporter's unit code is one line: the Blender-to-FBX factor is 100.0 * scene.unit_settings.scale_length, with a comment that FBX stores "the 'reference' unit of a file in its UnitScaleFactor property (1.0 meaning centimeter)". So every metre export carries a factor of 100 somewhere, and the Apply Scalings dropdown decides where.
The default, All Local, is described as "Apply custom scaling and units scaling to each object transformation, FBX scale remains at 1.0". Every object in the file gets a scale of 100 on its transform. Unity's Model tab then applies Convert Units, which "converts the model scaling defined in the model file to Unity's scale", and the prefab looks the right size, with a scale of 100 on the mesh and a file scale of 0.01 to cancel it. That's the famous 0.01. It works until you parent something to a bone, drive a transform from code, or retarget, and the hidden 100 shows up.
FBX Units Scale is "Apply custom scaling to each object transformation, and units scaling to FBX scale": the 100 moves into the file's unit header and every object keeps a scale of 1. FBX All puts both the unit factor and your custom Scale value in the header, which is the same result as long as Scale stays at 1.00. Either is right for Unity. The Unity side wants the defaults: Unity's Model tab says Scale Factor exists because "Unity's physics system expects 1 m in the game world to be 1 unit in the imported file", so leave it at 1 and leave Convert Units ticked.
Two other scale mistakes are common. If you changed Unit Scale in Scene Properties to work in centimetres, the exporter multiplies by 100 times that Unit Scale, and the Blender manual notes the setting "only influences the values displayed in the user interface and not how things behave internally", so a 0.01 Unit Scale with Apply Unit on can shrink a 180 cm character to 1.8 cm. And an object scale that isn't 1.0 gets baked into the FBX. Select everything and run Object > Apply > All Transforms (Ctrl-A). The Blender manual agrees: "It is recommended to apply transforms before rigging and animation." Don't apply scale to an armature that already carries animation, because that rescales the keyframes.
Axes: where the -90 on X comes from
Blender is Z up. The FBX manual states it plainly: "Blender uses Y Forward, Z Up (since the front view looks along the +Y direction). For example, its common for applications to use Y as the up axis, in that case -Z Forward, Y Up is needed." Unity is Y up and Z forward. Blender's front view looks along +Y, so a character modelled to face the front camera faces -Y, and the exporter's defaults of -Z Forward and Y Up are what map that to Unity's forward. Leave them.
Even with the right axes, the root object of a Blender FBX shows a rotation of -90 (often -89.98) on X in Unity's Inspector, with a compensating rotation on the children. That's the axis conversion stored as a transform rather than baked into vertices. Three ways to remove it, in order of preference.
Bake Axis Conversion in Unity. The Model tab option "Bakes the results of axis conversion directly into your application's asset data (for example, vertex or animation data) when you import a model that uses a different axis system than Unity." Tick it and the root reads 0, 0, 0, and nothing changes in Blender.
Counter-rotate in Blender. With all transforms applied, rotate the object -90 on X, apply rotation, then rotate it +90 on X and export without applying. The exporter's Use Space Transform ("Apply global space transform to the object rotations") turns that +90 into a zero rotation on the Unity side. Community add-ons automate this: the blender-to-unity-fbx-exporter project gives every exported object "a rotation of +90 degrees around the X axis in their transform without actually modifying the visual pose", reverted after export.
Apply Transform in the exporter. Don't, for anything rigged. Its own description ends "(WARNING! experimental option, use at own risk, known to be broken with armatures/animations)", and the exporter draws an error icon next to it. It works on a static prop, and it's still fine to skip.
Bones: leaf bones, orientation, and the Humanoid Avatar
Leaf bones. Add Leaf Bones is on by default and described as "Append a final bone to the end of each chain to specify last bone length (use this when you intend to edit the armature from exported data)". The exporter names each one after its parent plus _end, so Unity's hierarchy fills with Head_end, LeftHand_end and LeftToeBase_end. They're harmless for Generic rigs and they confuse Humanoid automapping and retargeting tools. Untick it. If you're re-importing someone else's FBX, the importer's Ignore Leaf Bones option strips them.
Control rigs. A Rigify or Auto-Rig Pro rig has hundreds of non-deforming bones for controls, IK targets and mechanisms. Only Deform Bones writes "Only deforming bones (and non-deforming ones when they have deforming children)", which is the skeleton Unity wants. Bake the animation onto the deform bones first, since control-rig constraints don't export, only their result as keyframes.
Bone orientation. Blender bones point along their local Y. Unity reads the bind pose and the skin weights and plays what it's given, so the Primary and Secondary Bone Axis settings can stay at Y and X. They matter when the same FBX goes to a tool that assumes a convention, such as Unreal or a retargeting add-on.
The Humanoid Avatar. Unity's Rig tab gives you Generic ("if your rig is non-humanoid (quadruped or any entity to be animated)") or Humanoid ("if your rig is humanoid (it has two legs, two arms and a head)"). Humanoid unlocks retargeting between characters, and it has rules, from the Avatar configuration page. The skeleton needs "at least 15 bones organized in a way that loosely conforms to an actual human skeleton". "If Unity can't create the Avatar, a cross appears next to the Configure button, and no Avatar sub-asset appears." Inside Configure, a bone Unity accepts "appears in green in the Avatar Mapping tab" and a rejected one "appears in red". And the pose: "If the bone assignment is correct, but the character is not in the correct pose, you will see the message 'Character not in T-Pose'. You can try to fix that by choosing Enforce T-Pose from the Pose menu."
So rig in a T-pose with the rest pose in a T-pose too, and name bones after body parts (Unity's guidance for automatic mapping is to name bones "in a way that reflects the body parts they represent"). Mixamo names (mixamorig:Hips, mixamorig:LeftArm) automap reliably, which is one reason so many riggers output them. If a few bones fail, drag them from the Hierarchy onto the slots, then Pose > Enforce T-Pose, then Apply, and save the result as a Human Template (.ht) for the next export of the same rig.
If you don't have a rig yet, the automatic rigging guide covers what auto riggers need from a mesh, and the Cinevva Rig add-on produces a Mixamo-named humanoid armature inside Blender, on your own machine, offline, for a one-time $29 launch price, on Blender 4.2 and newer for Windows, macOS and Linux.
Root motion
Root motion is the movement of the character's root through the world, as opposed to the limbs moving in place. Unity's root motion page works from a Root Transform that "is a projection on the Y plane of the Body Transform and is computed at runtime", and per clip you choose whether to bake rotation, Y and XZ into the pose or keep them as motion that moves the GameObject. Bake Into Pose on XZ is the normal setting for idles "to force the delta Position (XZ) to be 0" so the character doesn't drift. For Generic rigs the page says "instead of using the Body Transform to compute/project a Root Transform, the transform set in Root Node is used", and that Root Node defaults to None in the Rig tab, so pick your hips or root bone there or root motion silently does nothing.
On the Blender side the rule is: animate travel on a bone, not on the armature object. The exporter writes the armature object as a Null node (Armature FBXNode Type, "similar to Blender's Empty"), and Unity's root motion settings look at bones under the Avatar, not at that empty. A dedicated root bone at the floor, parent of Hips, keyed with the travel, is the layout Unity's Root Node option is designed for. Clips authored in place with the travel handled by code need no root bone at all, and that's what most animation libraries ship.
Animations: actions, NLA strips, and baking
Unity reads FBX AnimStacks and shows each one as a clip in the Animation tab, where you can split, rename, loop and trim them. Blender's Bake Animation panel decides how many AnimStacks you get.
One Action per clip. With All Actions on, the exporter will "export each action as a separated FBX's AnimStack, instead of global scene animation (note that animated objects will get all actions compatible with them, others will get no animation at all)". Name your Actions Idle, Walk, Run, Jump, and Unity lists them under those names. The catch in that description: any Action whose channels match the armature counts as compatible, so a stray Action from another rig attaches itself. Delete Actions you don't want shipped.
One NLA strip per clip. With NLA Strips on, the exporter will "export each non-muted NLA strip as a separated FBX's AnimStack, if any, instead of global scene animation". Push each Action down to its own track, mute the ones you're not shipping, and you get exact control over frame ranges, plus a way to export a clip that blends two Actions.
Bake first when constraints are involved. The Blender FBX manual lists constraints under things that don't export: "The result of using constraints is exported as a keyframe animation however the constraints themselves are not saved in the FBX." IK, Copy Rotation and Child Of get sampled at the export Sampling Rate, which is why Key All Bones ("Force exporting at least one key of animation for all bones") and Force Start/End Keying should stay on. Unity's own Bake Animations option is "only available for Autodesk Maya, Autodesk 3ds Max and Cinema 4D files", so the baking has to happen in Blender. Object > Animation > Bake Action with Visual Keying and Clear Constraints, on a copy, gives you an FK-only Action nothing can misread.
Simplify. The exporter's Simplify ("How much to simplify baked values (0.0 to disable, the higher the more simplified)") defaults to 1.0 and is safe for game clips. If a clip wobbles in Unity but not in Blender, set it to 0 and let Unity's Anim. Compression do the keyframe reduction.
Two Unity habits round it off. Files named [email protected] are collected automatically: per the splitting animations page, "Unity automatically imports all four files and collects all animations to the file without the @ sign in", so hero.fbx plus [email protected] gives one character with a Walk clip, and you can re-export a single clip without touching the mesh. And set Loop Time on cycles in the Animation tab, since FBX has no notion of looping.
Textures and the pink material
Blender's FBX exporter references textures by path unless you tell it to carry them. Set Path Mode to Copy, and then the Embed Textures toggle becomes available, described as "Embed textures in FBX binary file (only for 'Copy' path mode!)". The .fbx now contains the images. In Unity, the Materials tab keeps materials as sub-assets by default ("Use Embedded Materials"), and two buttons pull them out: Extract Textures writes the embedded images into a folder, and Extract Materials turns the sub-assets into editable .mat files. Do Textures first, then Materials, so the extracted materials point at the extracted textures. Once extracted, "new imports or changes to the original asset do not affect extracted materials", which is what you want: you can re-export the mesh a hundred times without losing the Unity-side material tweaks.
What arrives is the base colour and a few slots. FBX has no PBR standard that Blender's Principled BSDF maps onto one-to-one, so expect to assign roughness, metallic and normal maps by hand in Unity. The Material Creation Mode "Import via MaterialDescription" reads the material description embedded in the FBX and gets closer than the Standard (Legacy) mode.
Then the pink. Unity's error shader page: "Unity renders an object with the default error shader when there's a problem with that object's material or shader", such as a shader that doesn't compile or isn't supported, and "the default error shader is magenta (bright pink)." The specific case for imports: "If your project uses the Universal Rendering Pipeline (URP), Unity might render an object using the default error shader if the object uses a shader from the Built-In Render Pipeline." Imported FBX materials default to Built-in shaders, so in a URP or HDRP project they come in pink. Missing textures do not turn a material pink, they turn it grey or white.
The fix is one menu. Select the pink materials and run Edit > Rendering > Materials > Convert Selected Materials to URP, or open Window > Rendering > Render Pipeline Converter, choose Built-in Render Pipeline to URP, tick Material Upgrade and run it, per the converter docs. The one limit: "This converter doesn't support materials with custom shaders", which imported FBX materials never are. HDRP has the equivalent under Edit > Rendering > Materials.
Smoothing and normals
Blender's Smoothing dropdown has four options and one of them breaks a Unity feature. Normals Only exports "only normals instead of writing edge or face smoothing data", and the manual notes that "if the importer supports custom split normals, using Normals Only is generally the most accurate". Face writes face smoothing, Edge writes edge smoothing, Smoothing Groups writes groups of faces shaded together. Unity imports the normals fine in every case (its Normals setting defaults to Import). But Unity's Model tab warns, under Import BlendShapes: "Importing blend shape normals requires smoothing groups in the FBX file." Export a face with shape keys using Normals Only and the morph targets arrive with flat or broken shading.
Face is the safe default for Unity, and Smoothing Groups if you're also sending the file to 3ds Max style tools. If your hard edges come from the Smooth by Angle modifier, tick Apply Modifiers or they vanish. If a mesh looks faceted in Unity and smooth in Blender, switch Unity's Normals to Calculate and Smoothness Source to From Angle as a quick check, then fix the export.
Symptom, cause, fix
| Symptom in Unity | Cause | Fix |
|---|---|---|
| Model tiny, or 100 times too big | Scale Factor changed, Convert Units off, or a Blender Unit Scale other than 1.0 with Apply Unit on | Unity: Scale Factor 1, Convert Units on. Blender: Unit Scale 1.0, Scale 1.00 |
| Right size, but scale reads 100 and File Scale 0.01 | Apply Scalings left at All Local | Apply Scalings FBX Units Scale or FBX All, reimport |
| Root rotated -90 (or -89.98) on X | Axis conversion stored as a transform | Tick Bake Axis Conversion in the Model tab |
| Character faces backwards or sideways | Modelled facing +Y or +X in Blender | Face -Y in Blender (front view), keep Forward -Z |
Extra Head_end, Hand_end bones | Add Leaf Bones left on | Untick Add Leaf Bones |
| Hundreds of bones, IK targets, widgets in the hierarchy | Control rig exported whole | Tick Only Deform Bones, bake to deform bones first |
| Cross next to Configure, no Avatar | Fewer than 15 required bones matched, or bones unrecognised | Rename bones after body parts, check the 15 required, map by hand |
| "Character not in T-Pose" | Rest pose is an A-pose or relaxed | Pose > Enforce T-Pose, or fix the rest pose in Blender |
| Animation plays but character doesn't move | Root Node is None on a Generic rig, or travel keyed on the armature object | Set Root Node in the Rig tab, key travel on a root bone |
| Only one clip imported | NLA Strips and All Actions off, or Actions have no fake user | Turn both on, one Action or strip per clip |
| Limbs drift or snap where IK was | Constraints exported as sampled keys with Simplify too high | Bake Action in Blender, Simplify 0 |
| Materials bright pink | Built-in shaders in a URP or HDRP project | Convert Selected Materials to URP (or HDRP) |
| Materials grey, textures missing | Path Mode not Copy, Embed Textures off | Copy plus Embed Textures, then Extract Textures in Unity |
| Blend shapes shade flat or wrong | Smoothing set to Normals Only | Smoothing Face or Smoothing Groups |
| Faceted where Blender was smooth | Smooth by Angle modifier not applied | Tick Apply Modifiers |
| Everyone on the team gets an import error | .blend in Assets and no Blender on their machine | Export FBX, keep .blend out of Assets |
The 10-step checklist
Run this in Blender on a copy of the file, then in Unity.
- Clean the scene. Delete cameras, lights, reference images and anything not shipping. Join meshes that share a material where sensible, and make sure every mesh that should deform is parented to the armature with an Armature modifier.
- Check units. Scene Properties, Units: Unit System Metric, Unit Scale 1.0, Length Meters. Read the Dimensions panel (N) on your character: 1.6 to 2.0 m for a human.
- Apply transforms. Select meshes,
Object > Apply > All Transforms. For an armature without animation, apply too. For an animated armature, leave it and make sure its scale already reads 1.0. - Fix the pose and names. Rest pose in a T-pose, facing -Y (the front view). Bone names that read as body parts, mirrored
.Land.RorLeftandRight. No_endbones of your own. - Prepare the clips. One Action per clip with a fake user, or one NLA strip per clip. Bake anything driven by IK or constraints with
Object > Animation > Bake Action, Visual Keying on. - Export.
File > Export > FBX (.fbx). Selected Objects on. Object Types Armature and Mesh. Scale 1.00, Apply Scalings FBX Units Scale, Forward -Z, Up Y, Apply Unit on, Use Space Transform on, Apply Transform off. Smoothing Face, Apply Modifiers on. Only Deform Bones on for control rigs, Add Leaf Bones off. Bake Animation on with Key All Bones, NLA Strips, All Actions and Force Start/End Keying on, Sampling Rate 1.0, Simplify 1.0. Path Mode Copy, Embed Textures on. Save these as an operator preset (the + at the top of the panel). - Import. Drop the .fbx into Assets. Model tab: Scale Factor 1, Convert Units on, Bake Axis Conversion on, Import BlendShapes on if you have shape keys. Apply.
- Rig. Rig tab: Humanoid for a biped, Generic otherwise. Avatar Definition Create From This Model. Press Configure and check for green bones and no T-pose message. For Generic, set Root Node if the clip should move the character. Apply.
- Animation. Animation tab: confirm one clip per Action. Set Loop Time on cycles. Set Root Transform Position (XZ) Bake Into Pose on idles. Apply.
- Materials. Materials tab: Extract Textures to a Textures folder, then Extract Materials to a Materials folder. In a URP or HDRP project, select the extracted materials and
Edit > Rendering > Materials > Convert Selected Materials to URP. Drag the prefab into a scene and check scale, facing and shading against Blender.
The one-click route
If you'd rather not remember step 6, the Cinevva Rig add-on has an export card with a Unity preset that applies exactly this recipe: FBX, Forward -Z, Up Y, unit scale applied with FBX All, no leaf bones, Face smoothing, textures embedded and capped at 2048 px. Before you press Export, its size analysis splits the estimated file into geometry, textures, animation and shape keys, so you can see that the 60 MB is three 4K textures and not the mesh. Measured against a plain Blender GLB export, the presets produced files 68%, 89%, 92% and 98% smaller on four real models, almost all of it from the texture cap and re-encoding. Export runs locally with no key, no account and no network. The paid half of the add-on is rigging: one $29 launch-price purchase, unlimited local rigging after a one-time engine download of about 2.4 GB, on Blender 4.2 and newer, plus 260 CC0 animation clips retargeted onto the rig inside Blender, which then export as the Actions described above.
The established paid fix for the FBX round trip is Better FBX Importer & Exporter by Mesh Online, 12,800+ sales on Superhive. It's a from-scratch FBX implementation on Autodesk's official FBX SDK, "compatible with all FBX versions, from ASCII to binary, from FBX 5.3 to FBX 2020", with exports "verified in Unity Engine 2021, Unreal Engine 4/5 and Godot Engine v4.1.1" per its product page. Its two standout features are automatic bone orientation on import (the bone axes Blender's importer leaves twisted) and an "Optimize For Game Engine" export that writes armatures with "unit scale and zero rotations". If you import a lot of FBX from other artists or round-trip through Maya or 3ds Max, it pays for itself the first week. If you only export your own Blender work to Unity, the settings on this page get the same result for free.
Common Questions
How do I export from Blender to Unity?
Export an FBX, not the .blend. File > Export > FBX (.fbx) with Selected Objects on, Scale 1.00, Apply Scalings FBX Units Scale, Forward -Z, Up Y, Add Leaf Bones off, Smoothing Face, Path Mode Copy with Embed Textures on. In Unity's Model tab tick Convert Units and Bake Axis Conversion, then extract textures and materials from the Materials tab.
Why is my Blender model scaled 0.01 or 100 in Unity?
FBX counts in centimetres, so Blender's exporter multiplies a metre scene by 100. With the default Apply Scalings of All Local that 100 lands on every object's transform and Unity's Convert Units cancels it with a 0.01 file scale. Choose FBX Units Scale or FBX All instead and the factor goes into the file header, leaving every transform at 1. If the model is 100 times too big, Convert Units is off or Scale Factor was changed in Unity.
Why does my Blender FBX have a -90 rotation on X in Unity?
Blender is Z up and Unity is Y up, and the exporter stores the 90 degree turn between them as a rotation on the root object, which Unity displays as -90 (often -89.98). Tick Bake Axis Conversion in Unity's Model tab and the rotation is baked into the vertices and the root reads zero. Don't use the exporter's Apply Transform on a rigged model, since its own description says it's broken with armatures and animation.
How do I export animations from Blender to Unity?
Make one Action per clip (or one NLA strip per clip), bake any IK or constraint-driven motion with Bake Action, and export with Bake Animation on, Key All Bones, NLA Strips, All Actions and Force Start/End Keying ticked. Each Action arrives as a clip in Unity's Animation tab under its Blender name. For a Generic rig set Root Node in the Rig tab if you want root motion, and set Loop Time on cycles.
Should I use FBX or glTF for Unity?
FBX for anything rigged or animated. Unity imports FBX natively, while glTF needs the com.unity.cloud.gltfast package, whose animation import is complete only for the legacy Animation system and needs "further work" for Mecanim, and Unity can't read WebP textures. glTF is a good choice for static props and for models loaded at runtime from a server.
Why are my materials pink in Unity after importing from Blender?
Pink is Unity's error shader, and for imports it almost always means the material uses a Built-in Render Pipeline shader in a URP or HDRP project. Select the materials and run Edit > Rendering > Materials > Convert Selected Materials to URP, or use Window > Rendering > Render Pipeline Converter. Missing textures make a material grey, not pink: for those, export with Path Mode Copy and Embed Textures, then press Extract Textures in Unity.
Why won't Unity make a Humanoid Avatar from my Blender rig?
Unity needs at least 15 required bones it can recognise and a T-pose. A cross next to Configure means the mapping failed, red bones in the Mapping tab are the ones it couldn't place, and "Character not in T-Pose" means the rest pose is off. Name bones after body parts (Mixamo names always map), untick Add Leaf Bones so _end bones don't confuse it, drag any red bones into place by hand, and use Pose > Enforce T-Pose.
Related
- Blender to Unreal Export Checklist: the same walk for Unreal, where the units and bone axes go the other way
- Blender to Godot Export Checklist: glTF is the native path in Godot 4, and the settings differ
- How Automatic Rigging Works: what a rigger needs from your mesh before any of this matters
- How to Optimize GLB Files for the Web: Draco, Meshopt and KTX2 for the browser, where glTF is the right format
- GLB Viewer: inspect a glTF's scene graph, bones and clips before you re-export it for Unity
- Cinevva Rig for Blender: rigging, 260 CC0 clips and the Unity export preset in one add-on